Table of Contents
 Download the PDF
This Transfers Guide provides step-by-step instruction for the Transfers Tile found on the Home Screen of TCU Mobile and Online Banking. The functionality outlined in this document includes: The Transfers Landing Screen, Adding Transfer Accounts, Transfer Initiation, Alerts, Transfer List, Transfer Details, and Searching Transfers. Easily access all of these functions by clicking on the Transfers Tile (shown below).
Transfers Landing Screen
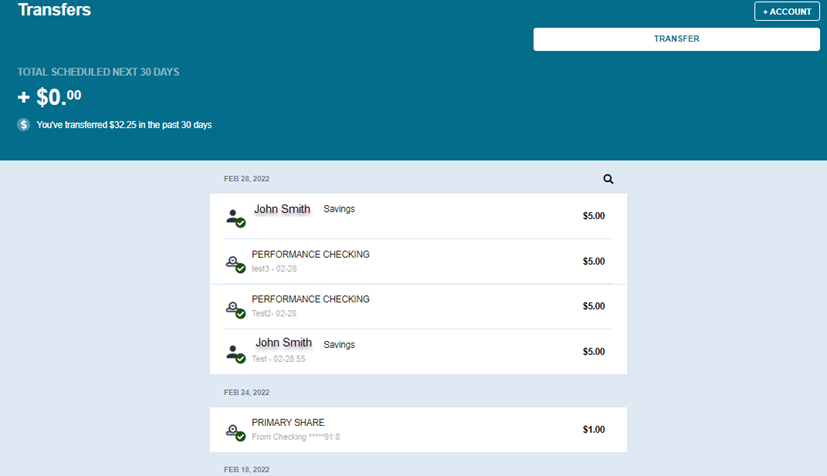
Clicking the Transfers Tile directs you to the Transfers Landing Screen. This screen allows you to view summary information of historical and future-scheduled transfers, add additional transfer accounts, and initiate a new transfer. You can also view a sequential list of transfers and edit scheduled transfers.
Return to top
Adding Additional Transfer Accounts
Add accounts belonging to another TCU Member or your external accounts at other financial institutions to utilize in Transfers.
To add an Additional Account
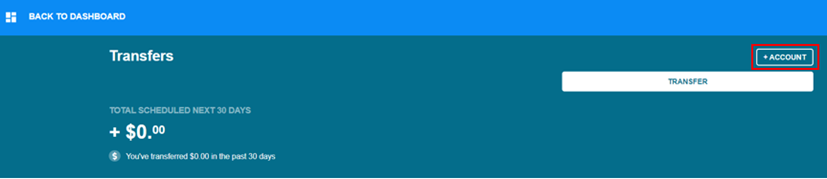
1. On the Transfers Screen, click the +Account button
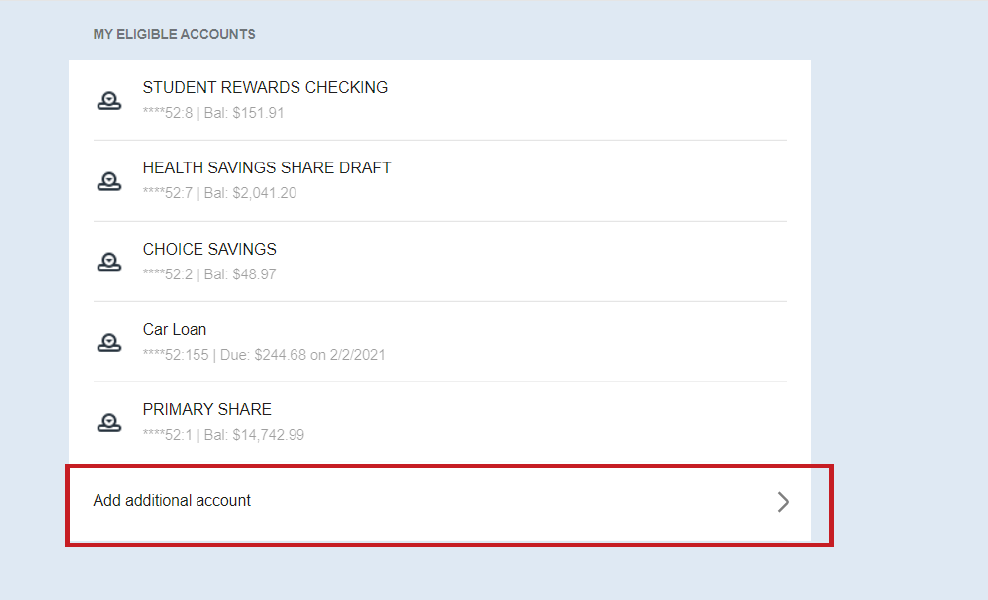
2. The Accounts Screen displays. Click Add additional account to add an external account. (Or clicking Close returns you to the Transfers Screen)
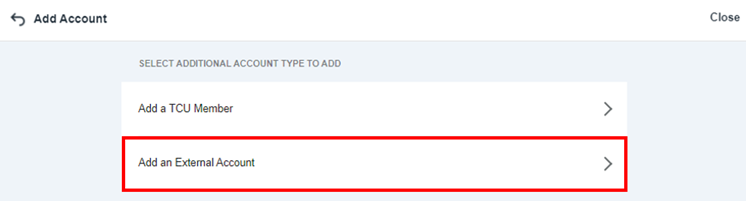
3. Next, click Add a TCU Member to add a TCU Member account or Add an External Account to add an account from another financial institution.
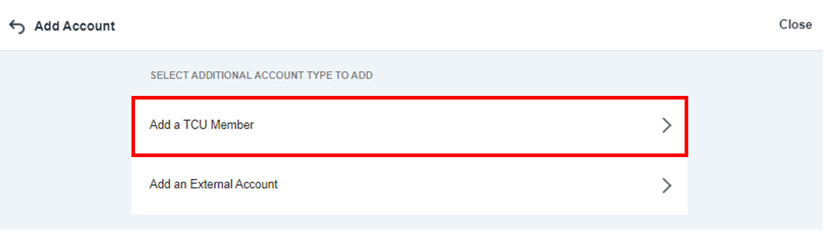
To add a TCU Member Account
a. Click Add a TCU Member. The Member-to-Member Transfer Screen displays:
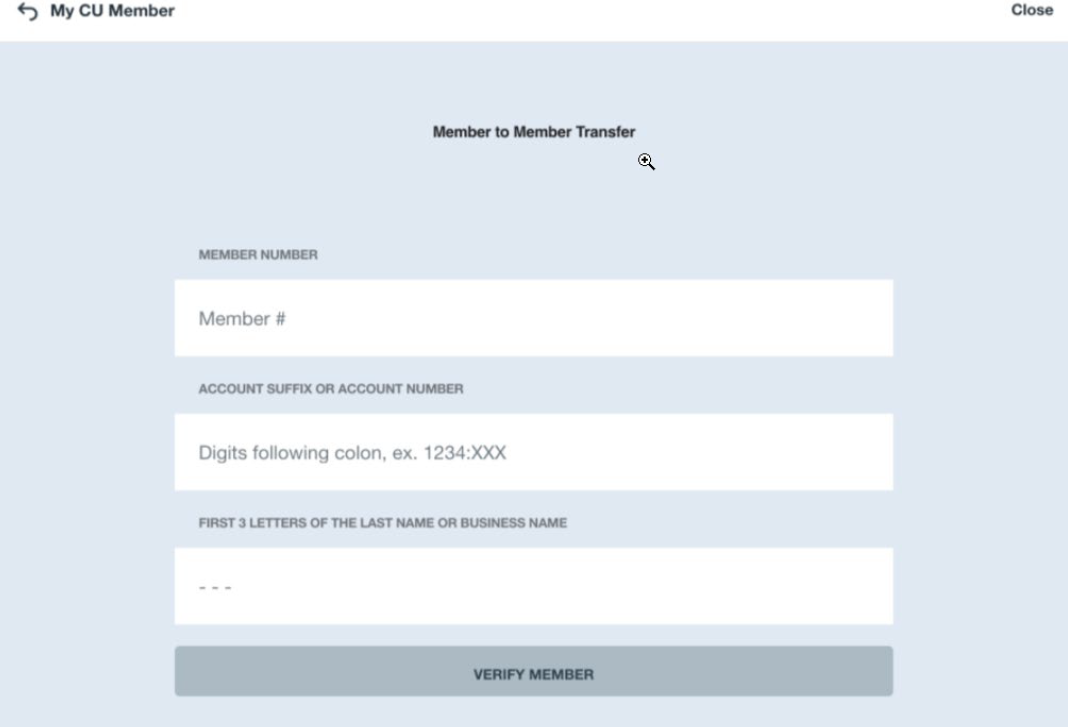
b. Enter the following information
- Member Number
- Enter the Member Number associated with the account to add
- Account Suffix or Account/Loan Number
- Enter the Acct Suffix associated with the account. This is the number following the colon and may be 1, 2 or 3 digits depending on the type of account. (Digits following colon, i.e., 1234:x) In this example, the x would be the account suffix.
- First 3 Letters of Last Name
- Enter the first 3 letters of the Member’s last name, or the first 3 letters of the business name
c. Once all fields are complete, click the Verify Member button
After clicking Verify Member, a “Searching” message displays while the information is validated. An error message displays if you attempt to add your own account or if invalid Member information is entered. Clicking “Try Again” returns you to the previous screen to re-enter information.
d. If valid information is returned, a success message displays:
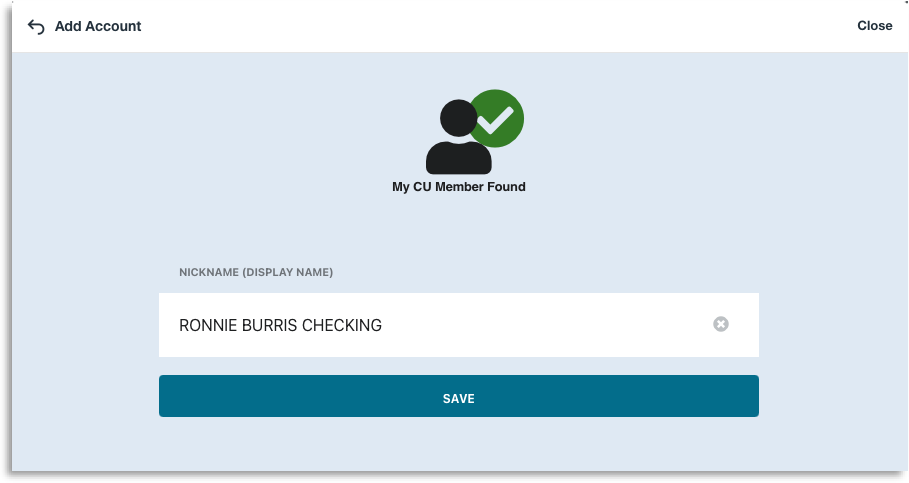
e. To edit the Account Nickname, click the icon to clear all text, or click into the field and begin typing:
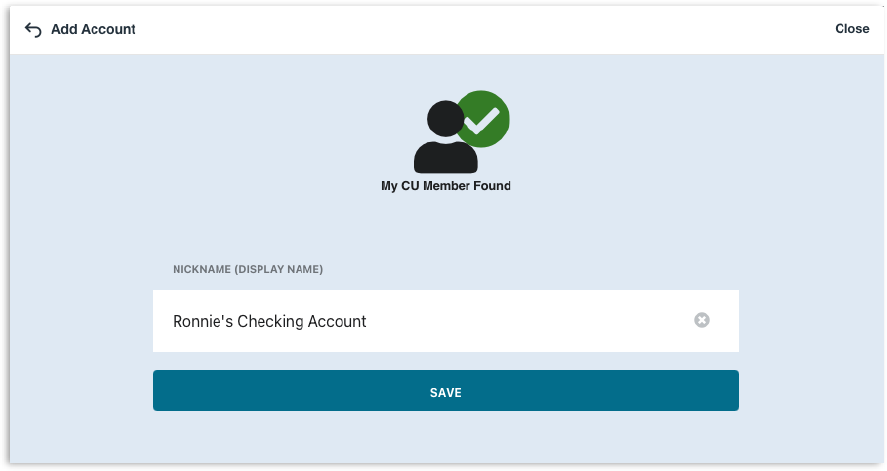
f. Click Save to proceed
g. The external Member account now displays on the Accounts List under Other Accounts
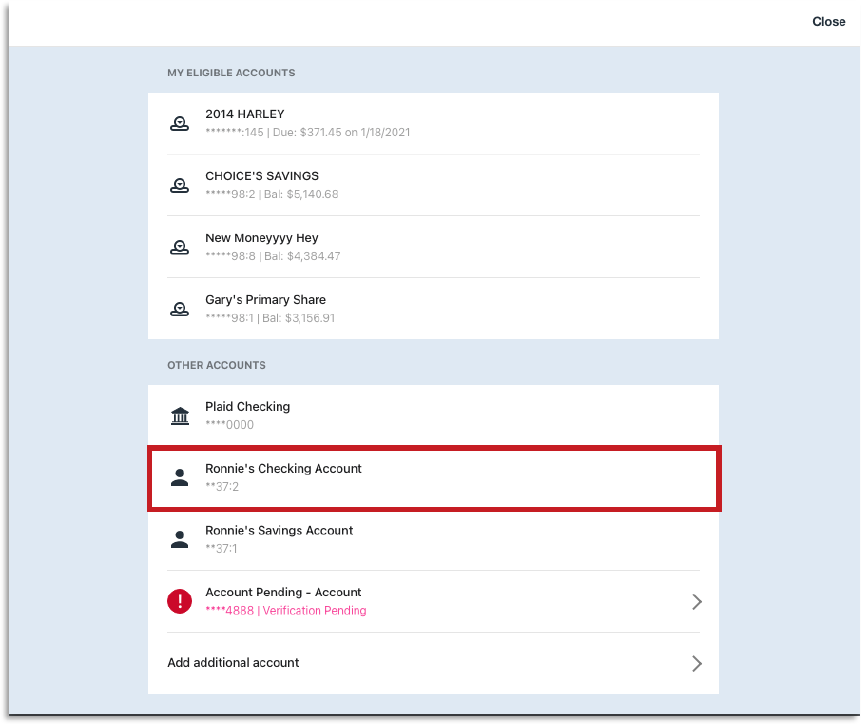
External accounts will display masked account information and will not display any balance information.
To Add an Account from Another Institution by Login Credentials:
a. On the Transfers Screen, click +Account
b. Click Add additional account under Other Accounts
c. On the next screen, click Add an External Account
d. Review the disclosure information, then click Continue to proceed, or click the X to exit.

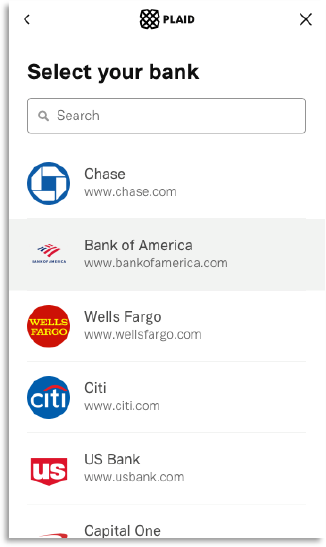
e. On the next screen, select the external financial institution or search by name
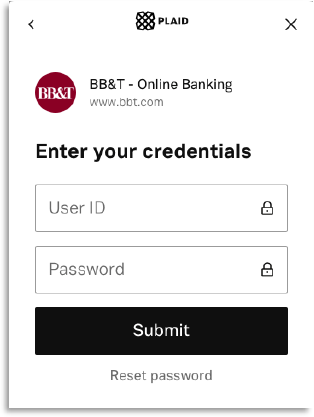
f. Enter the credentials associated with the account, then click Submit
g. Proceed with any additional verification steps, then click Submit once completed
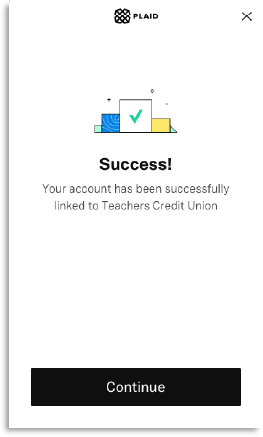
h. Once all requirements of the external institution are met, a success message displays. Click Continue to proceed
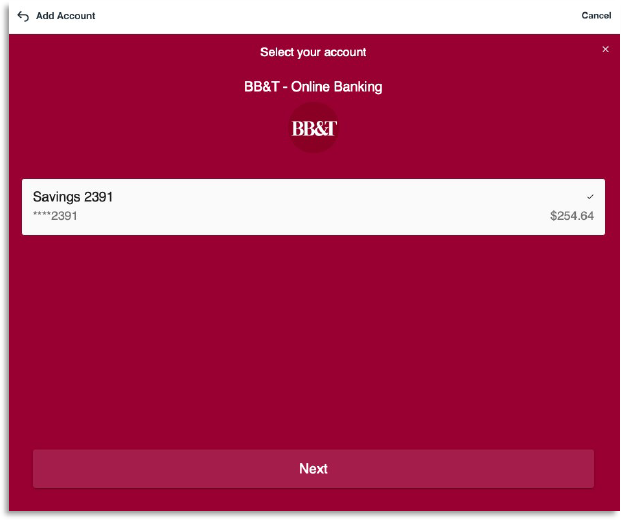
i. Select the external account to add, then click Next
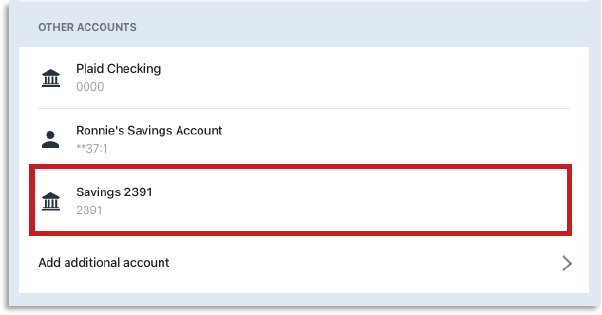
j. The account now displays on your Accounts List
Return to top
To Add an Account from Another Institution with Microdeposits:
a. On the Transfers Screen, click +Account
b. Click Add additional account
c. On the next screen, click Add an External Account
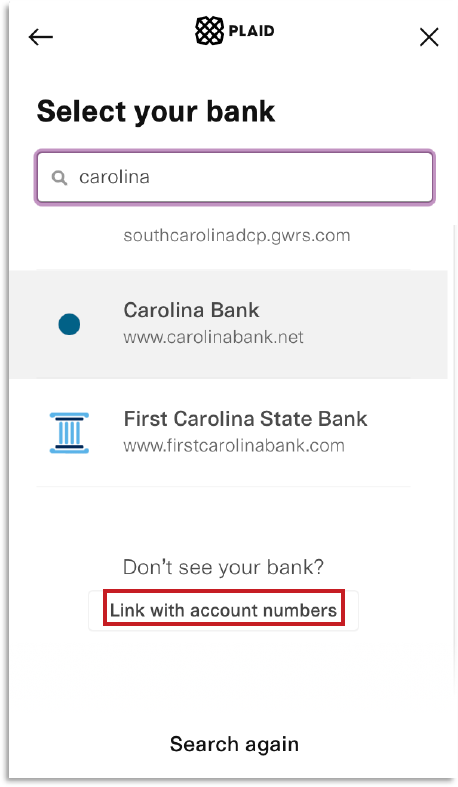
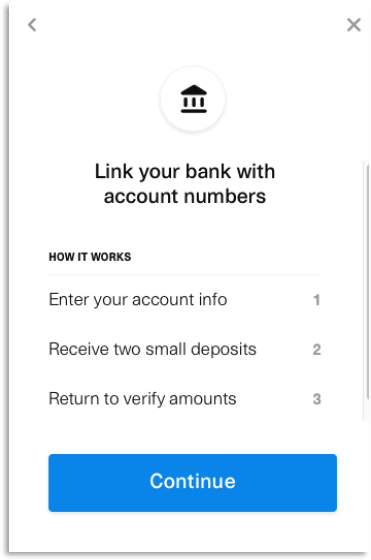
d. Search for the financial institution, then click Link with account numbers
e. Review the information on the following screen, then click Continue
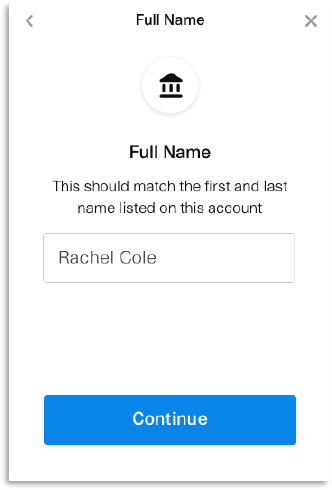
f. Enter the First and Last Name associated with the account, then click Continue
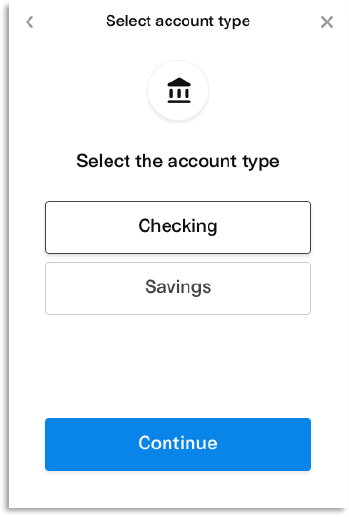
g. Select the account type, then click Continue
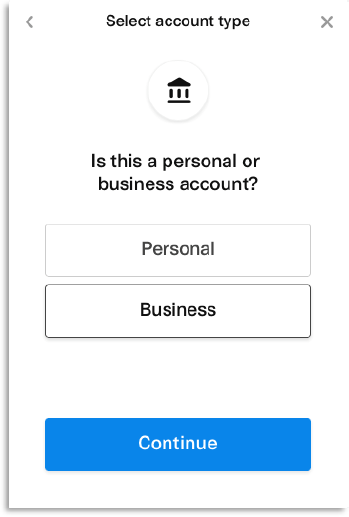
h. Next, select Personal or Business as the account type, then click Continue
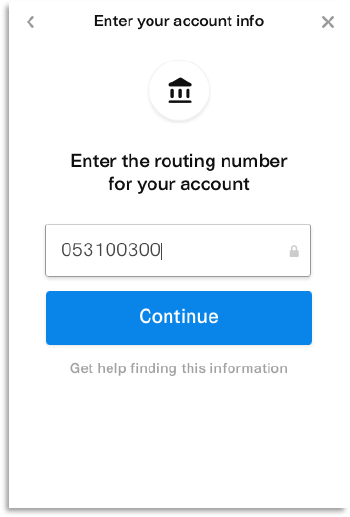
i. Enter the routing number for the account, then click Continue
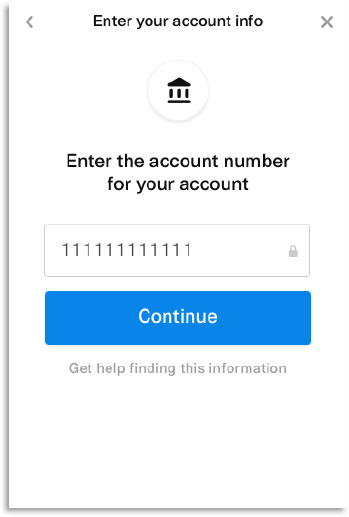
j. Enter the account number, then click Continue
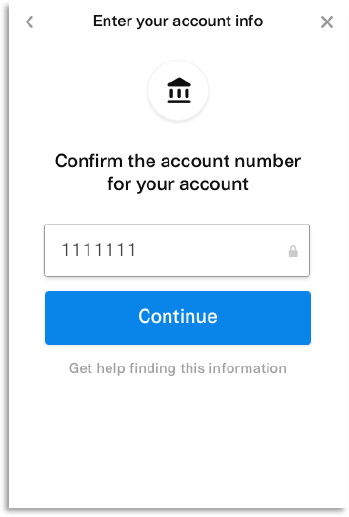
k. Re-enter the account number for confirmation, then click Continue
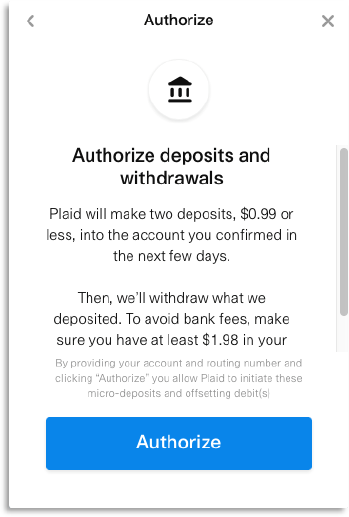
l. Review the authorization disclosure, then click Authorize to proceed
m. A success message displays. Click Continue to proceed

n. The pending microdeposit validation screen displays. Click Continue to proceed
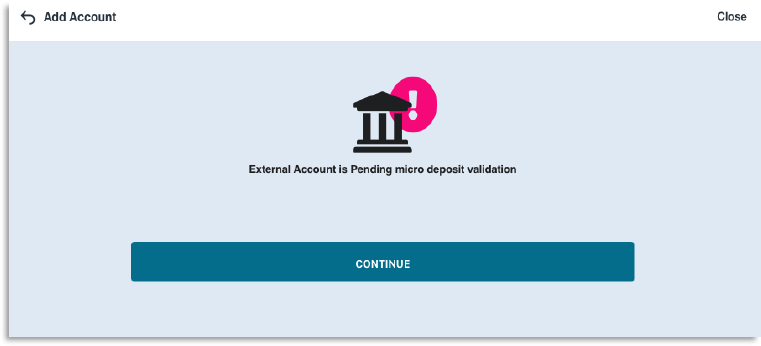
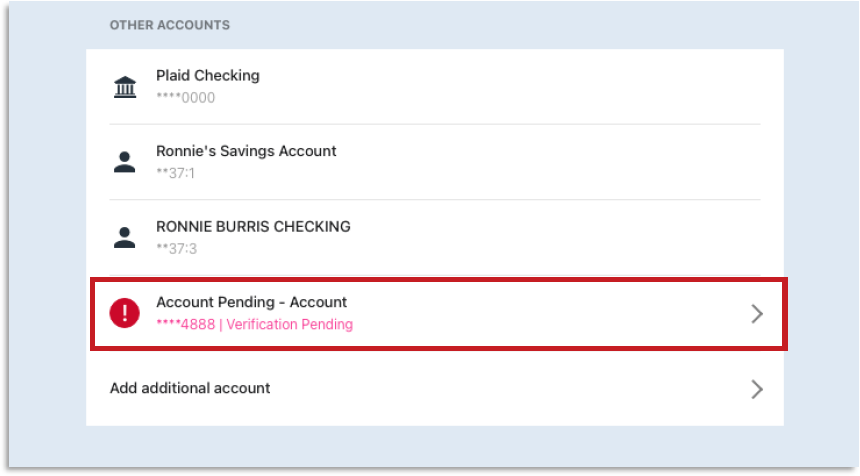
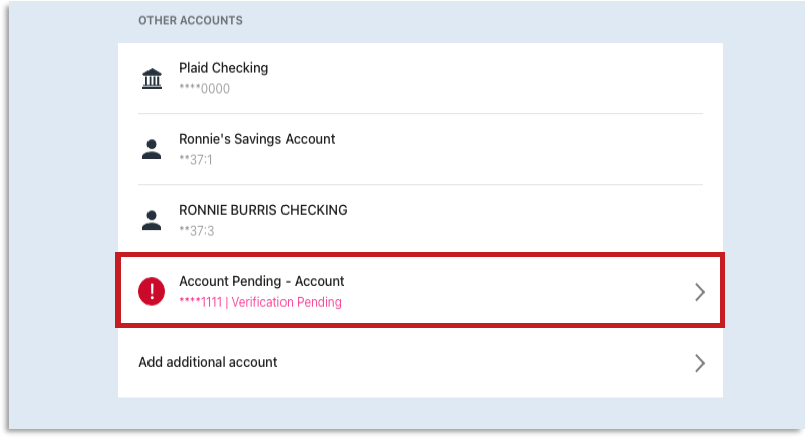
o. The account displays as an account pending verification under Other Accounts
Return to top
To Validate an Account by Microdeposits
1. On the Transfers screen, click +Account
2. Locate and click the account to verify under Other Accounts
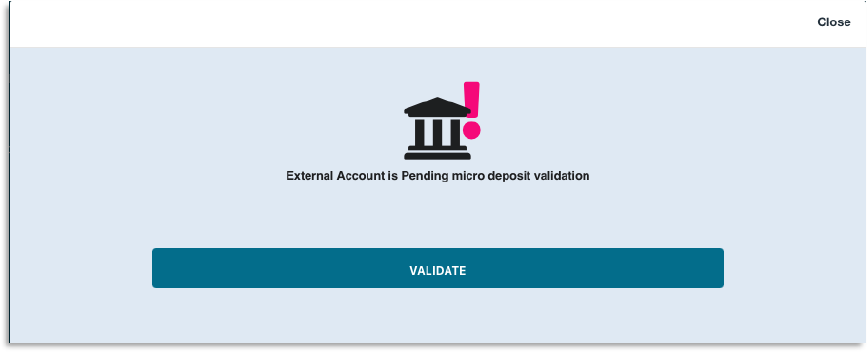
3. The microdeposit validation screen displays. Click Validate to proceed
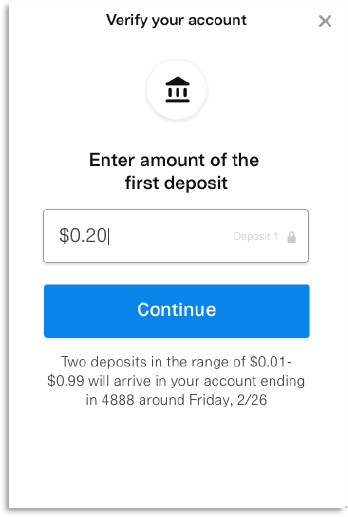
4. On the next screen, enter the amount of the first deposit, then click Continue
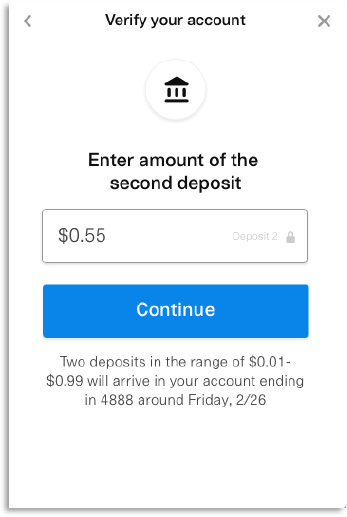
5. Enter the amount of the second deposit, then click Continue
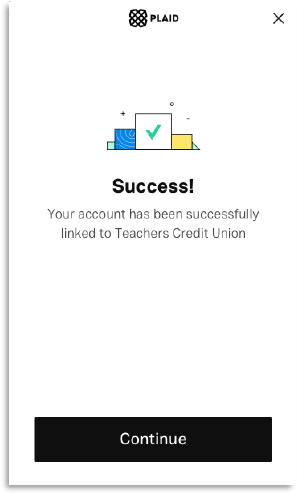
6. A success message displays, click Continue to proceed
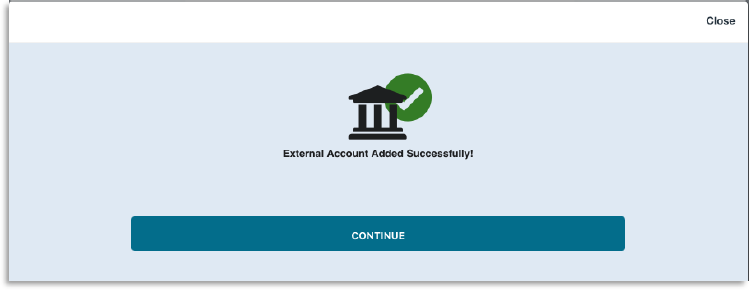
7. Click Continue on the next screen to return to the Transfers Screen
Return to top
To Remove a Linked External Account
1. On the Transfers screen, click +Account
2. Locate the account to remove under Other Accounts
3. Click and hold the account to remove, then drag or swipe right-to left
4. The delete icon displays 
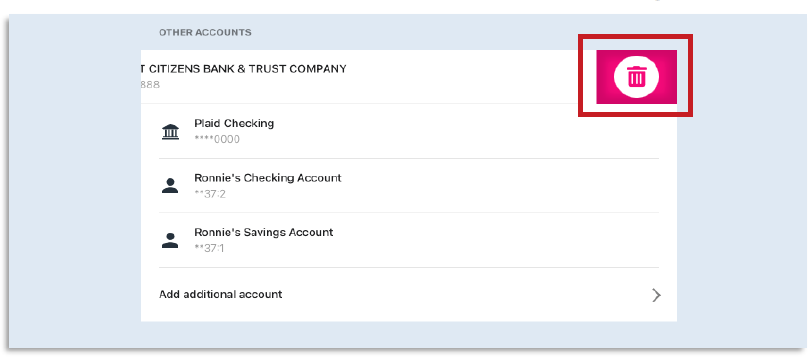
5. A confirmation displays. Click Delete Account to proceed with removing the account, or click Cancel to retain the account

6. A confirmation for the deletion occurs. Click OK to hide the message

Return to top
Transfer Initiation
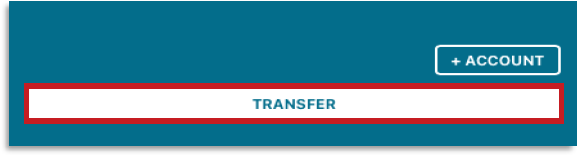
The Transfers Screen allows you to initiate Transfers between accounts. To initiate a Transfer:
1. On the Transfers Screen, click the Transfer button
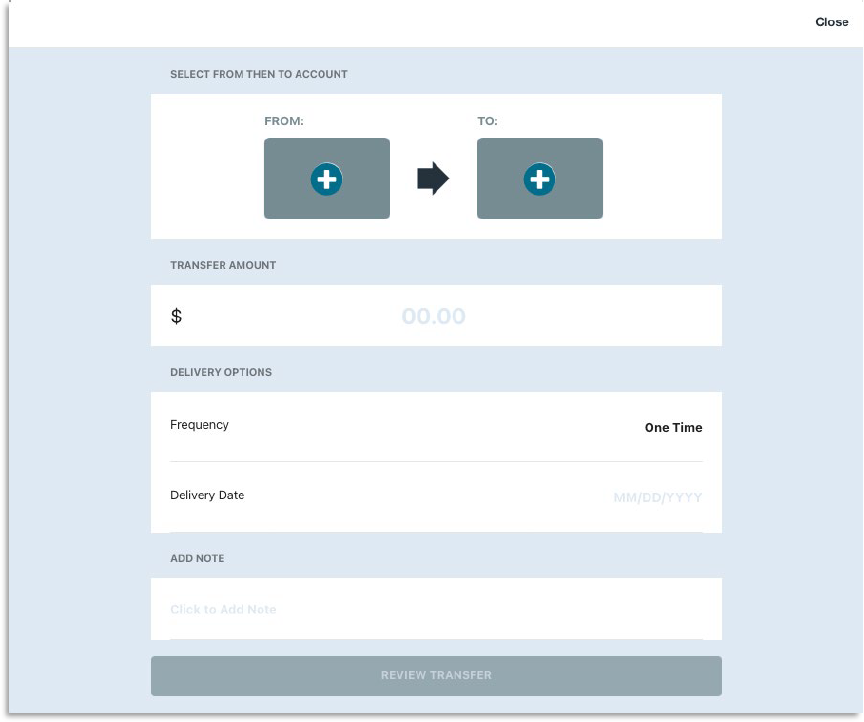
2. The Start Transfer Screen displays
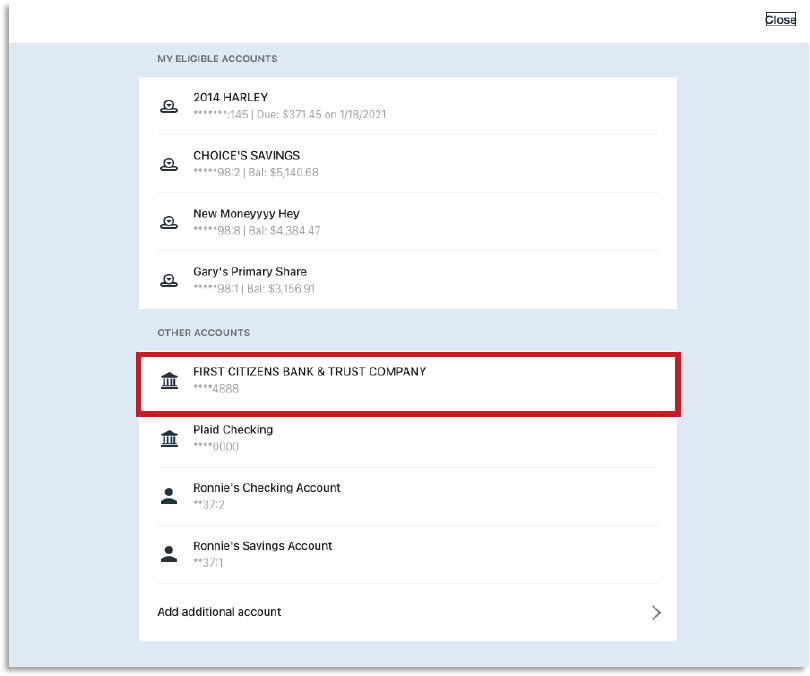
3. Click the  icon in the From: section to view the list of available accounts to transfer from. My Eligible Accounts lists internal accounts. Other Accounts lists external accounts.
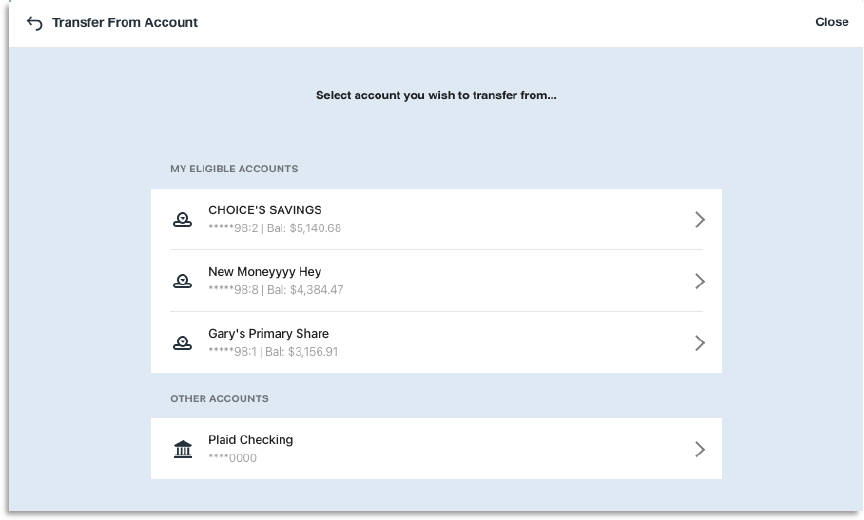
Your internal accounts will display masked account numbers along with balance summary information.
4. Click or tap the account to transfer funds from. The selected account updates in the From: section
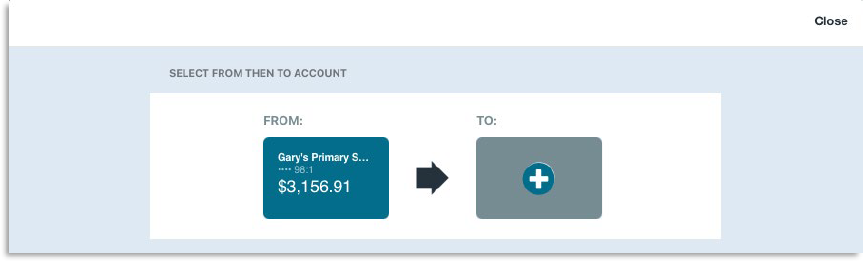
5. Next, click the icon in the To: section to view the list of available accounts to transfer funds to from the list of My Eligible Accounts or Other Accounts
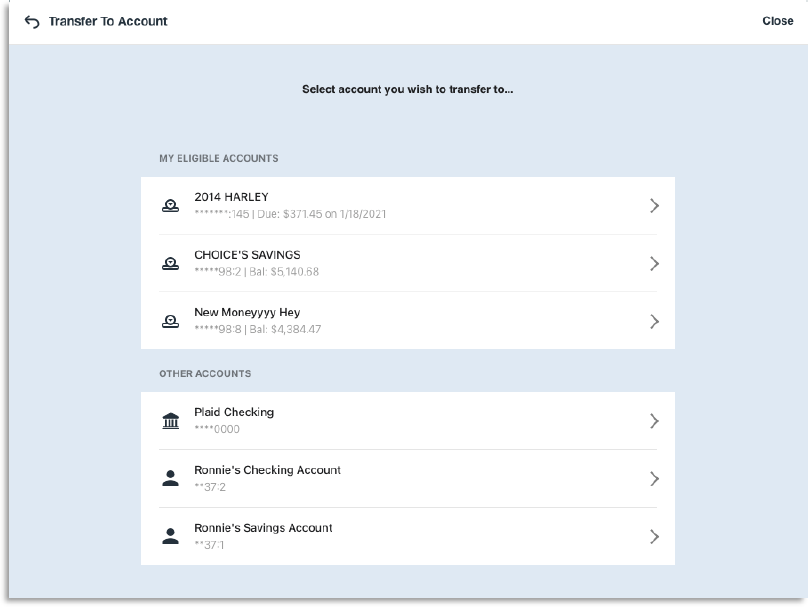
6. Click or tap the account to transfer funds to. The selected account updates in the To: section
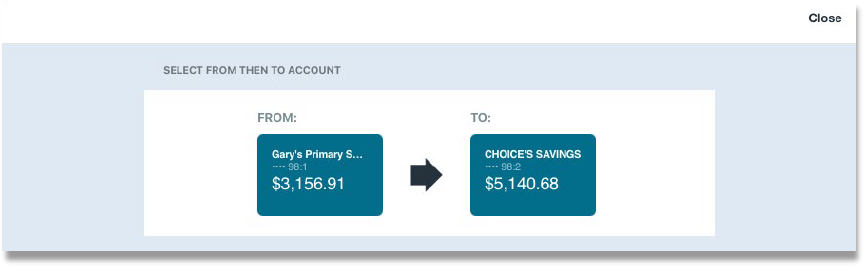
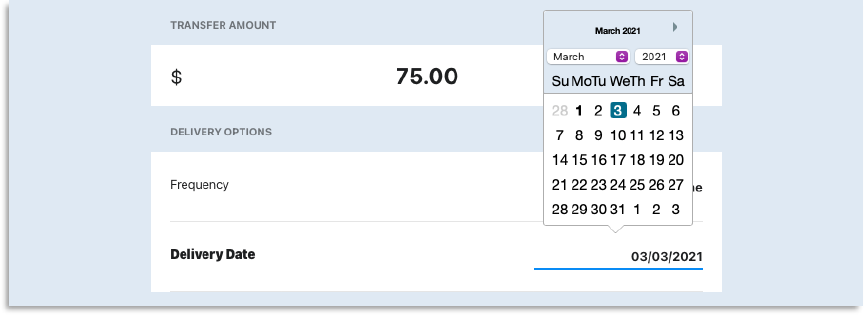
7. Next, enter the Transfer Amount in dollars

8. For One Time transfers (the default option), enter the Delivery Date or select using the calendar
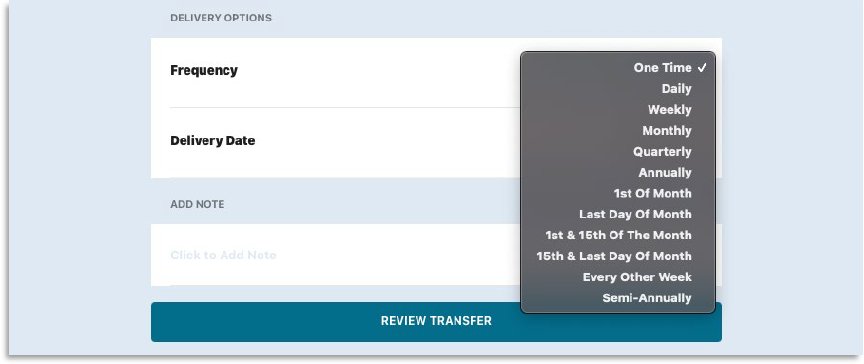
9. For recurring transfers, click One Time to view and select additional frequency options
10. Select the Start Date and End Date for the recurring transfer
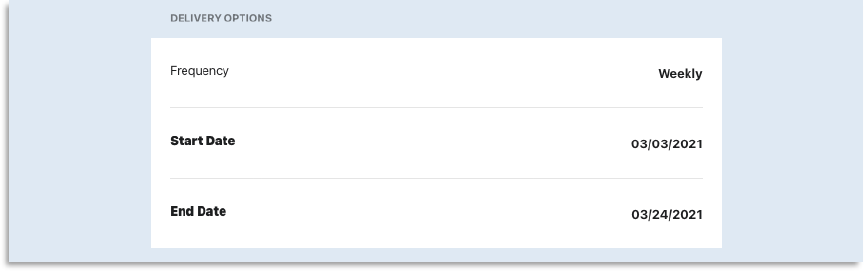
For recurring transfers, first delivery of the transfer will occur on the Start Date. If the transfer frequency includes the 1st, 15th, or Last Day of the Month, the first delivery of the transfer will occur on the next upcoming date. For example, if the Frequency is set as 1st and 15th of the Month and the Start Date is entered as the 12th, the first delivery will occur on the 15th since it is the next upcoming date.
11. Click or tap into the Add Note field to attach a note to the Transfer, if desired

12. Once all fields are complete, click Review Transfer
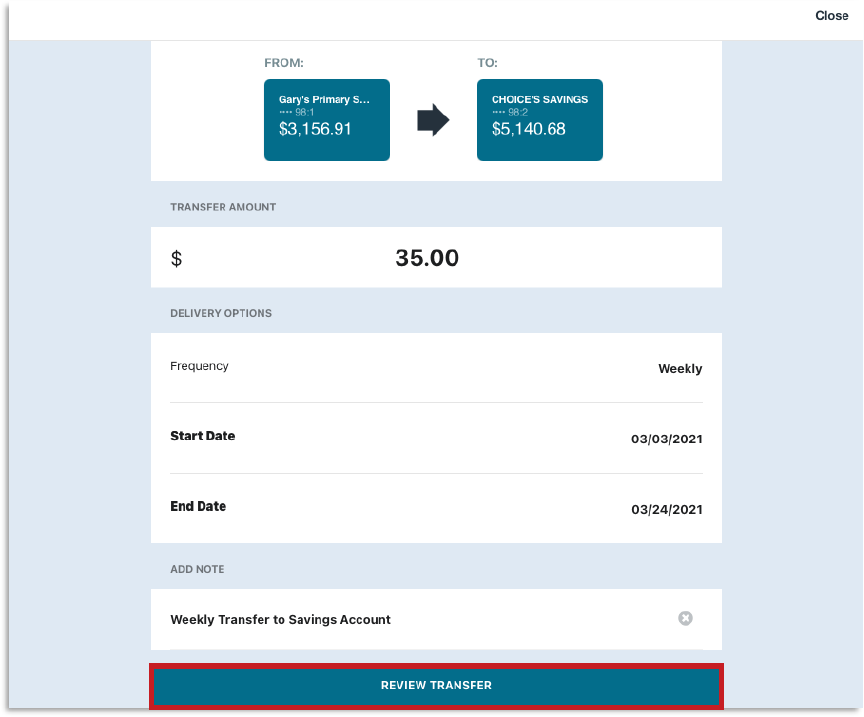
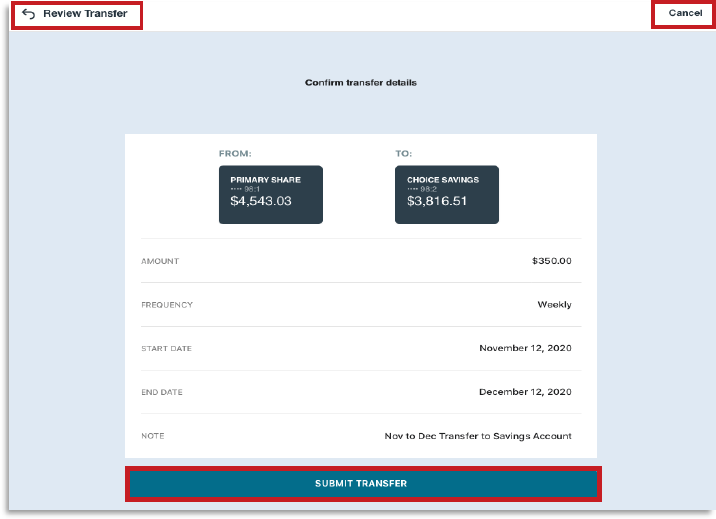
13. The next screen displays the entered transfer information. Click Submit Transfer to continue, Review Transfer to return to the prior screen to make changes, or Cancel to exit without submitting the Transfer
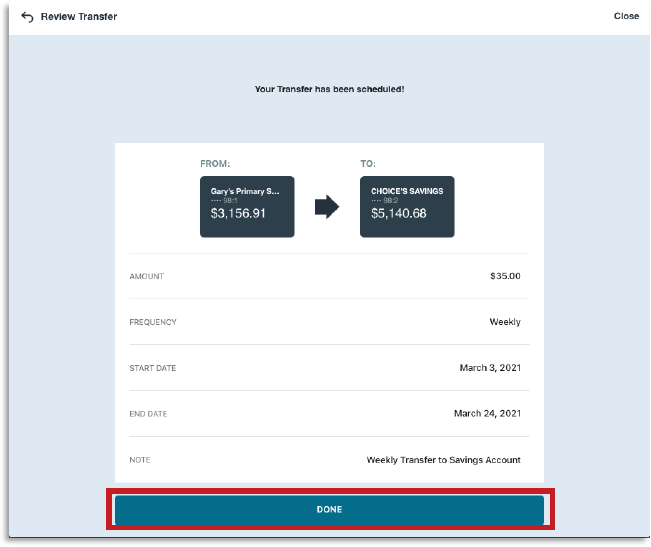
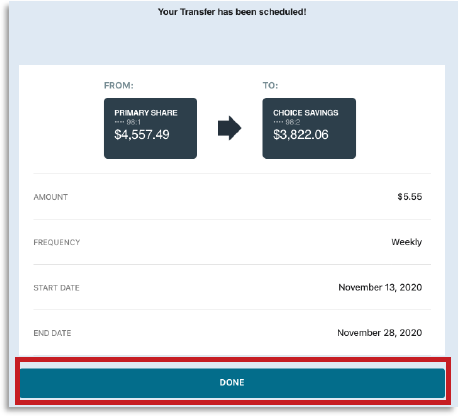
14. After clicking Submit, the Transfer details display. Click Done to return to the Transfers Screen
15. The Transfer displays as scheduled in the Transfer List
Once a Transfer is successfully initiated, you will be notified. You can configure your alerts in Notification Settings to customize which Transfer notifications you receive and the delivery method.
Return to top
Transfer Alerts
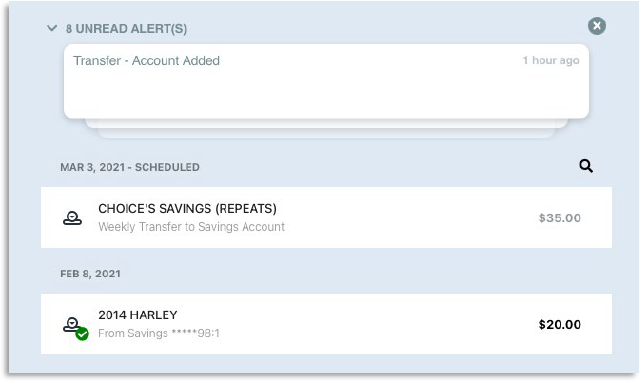
The Transfers Screen houses an Alerts section to notify Members of transfer-related activity and other information as configured by the Credit Union. To access unread alerts:
1. Multiple alerts display in a collapsed view. To expand, click the  next to the number of unread alerts
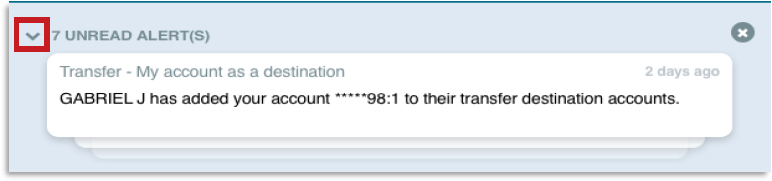
2. Click or tap the alert to view more information
The type of alert determines where the Member is directed after clicking the alert. Account addition alerts direct the Member to the Accounts List. Initiated or scheduled alerts direct the Member to the Transfers Details screen.
3. Alternatively, click the  to clear all unread alerts
Return to top
Transfer List
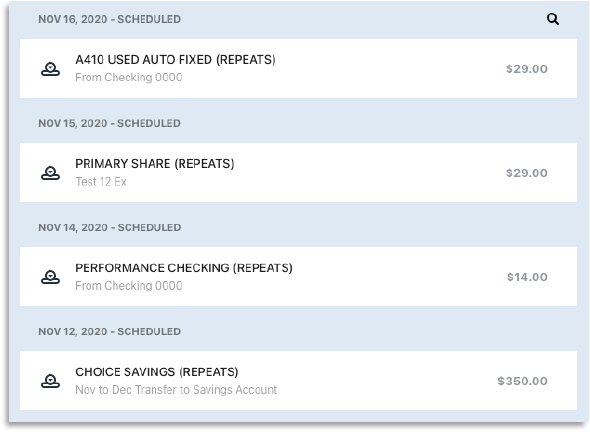
The Transfer List displays past and future-scheduled transfers within a 30-day period. Please note: this list includes transfers sent or scheduled through the Transfers tile and does not include the transfers you have received. All transfers received can be found in your Account tile, where the date and amount of the transaction will be provided.
Transfers display in sequential order by date. You can view the transfer status, “Transfer to” account, transfer amount, and note (if added). If a note is not added, the “Transfer from” account displays. Go to the Searching Transfers section to learn how to search for more transfers using the Search Field or by applying filters.
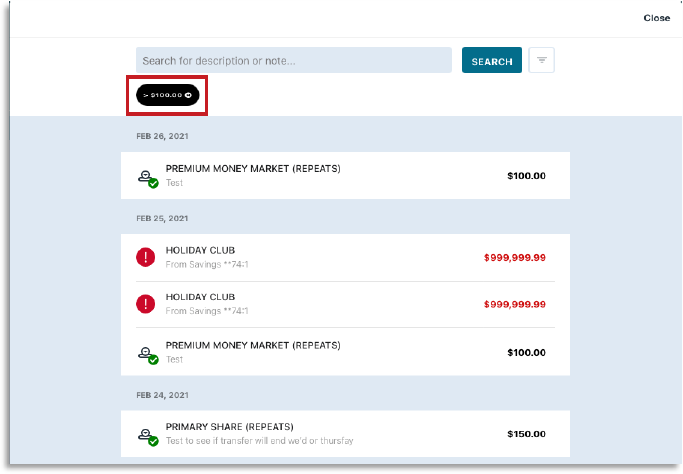
Transfer Status Icons
You can view the Transfer Status according to the icons listed on the Transfer List. Failed transfers display a red exclamation point and the transfer amount displays in red.

Successful transfers display a green checkmark, and the transfer amount displays in bold.

Scheduled transfers that have not yet cleared display the Transfer icon without any additional symbols. The transfer amount remains gray until the transfer occurs.

A same-date transfer will show as scheduled until the transfer occurs, depending on the time that it is processed. With recurring transfers, the initial transfer in the series will show the green checkmark once processed. The next transfer in the series will display within the 30-day period. The pending transfers in the series remain gray and will not show the checkmark until processed and cleared.
Return to top
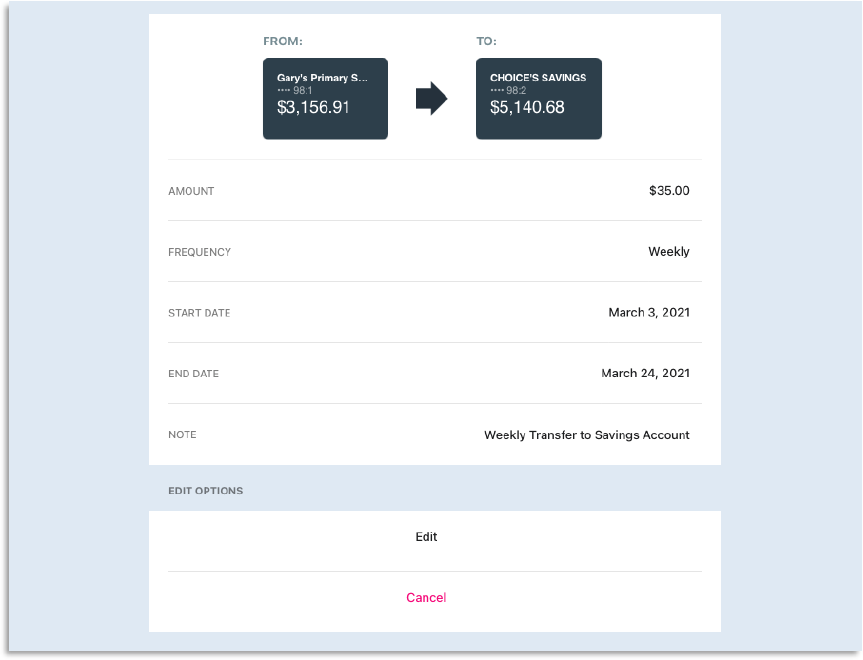
Transfer Details
You can select a transfer from the Transfers List to view Transfer Details. The Transfer Details screen displays the Transfer Status, Next Scheduled Date (if applicable), Transfer From: and To: accounts, Amount, Frequency, Delivery Date, Start Date and End Date (for recurring transfers), and Notes entered. Please note: Transfers received are not included in your Transfers Tile. You will not find them on the Transfers List and will not be able to see any details within Transfer Details. All transfers received can be found in your Account tile, where the date and amount of the transaction will be provided.
Transfer Status Icons
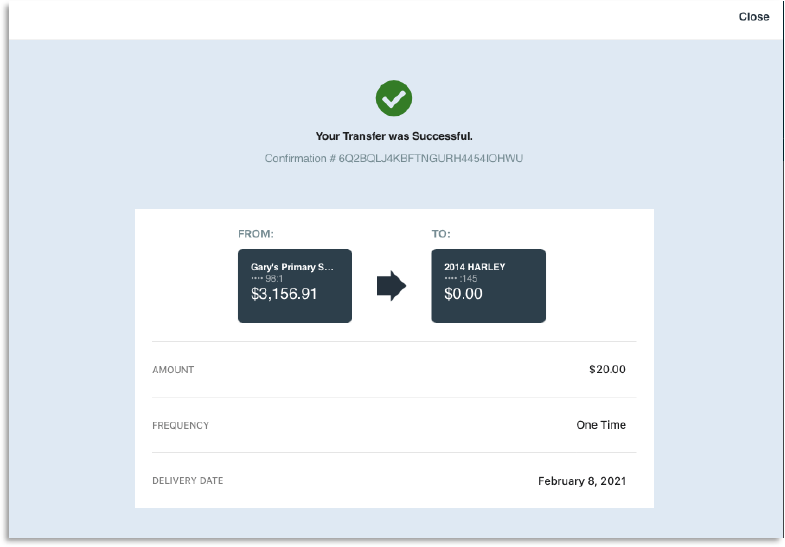
Completed Transfers display a checkmark and the confirmation number.

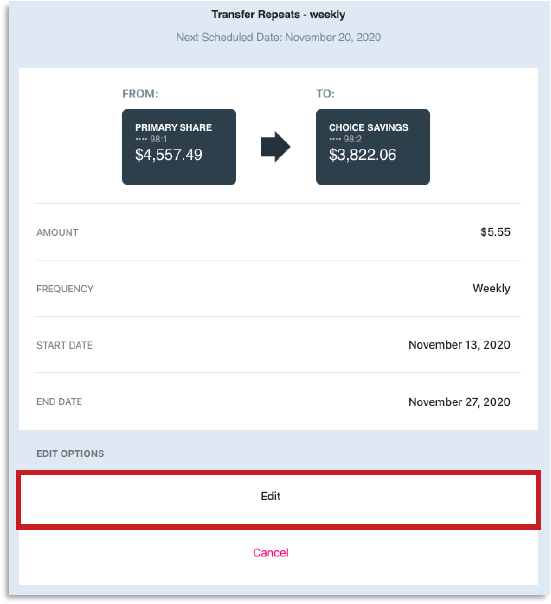
Recurring Transfers display an arrow, the transfer frequency, and the next scheduled date.

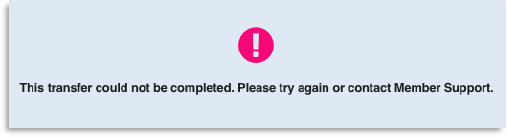
Failed Transfers display an exclamation point and direct you to try again or contact Member Support.
Editing and Canceling Transfers
You may edit scheduled transfers that have not been processed.
To edit a transfer:
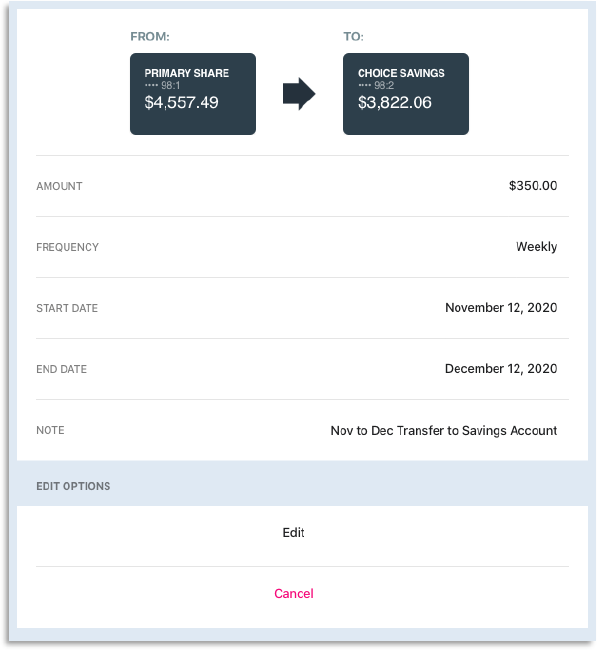
1. Click the scheduled transfer to edit on the Transfers List, then click Edit
Scheduled transfers for external accounts are not editable the same day that they are initiated. However, they may be edited the day after they are initiated.
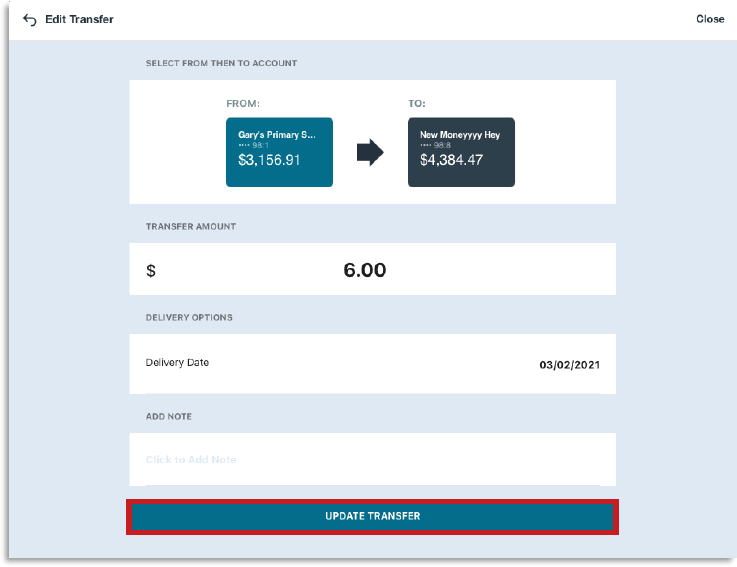
For One-Time Transfers:
a. Edit the transfer information, then click Update Transfer when finished
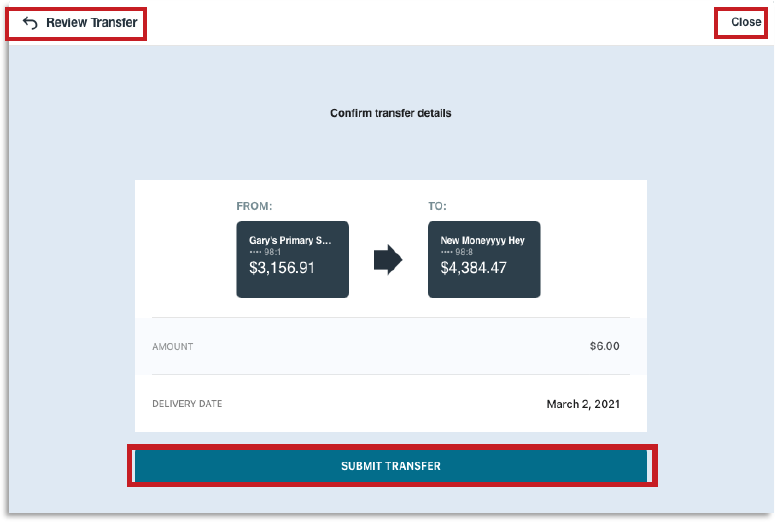
Review the updated information, then click Submit Transfer or click Review Transfer to make additional edits
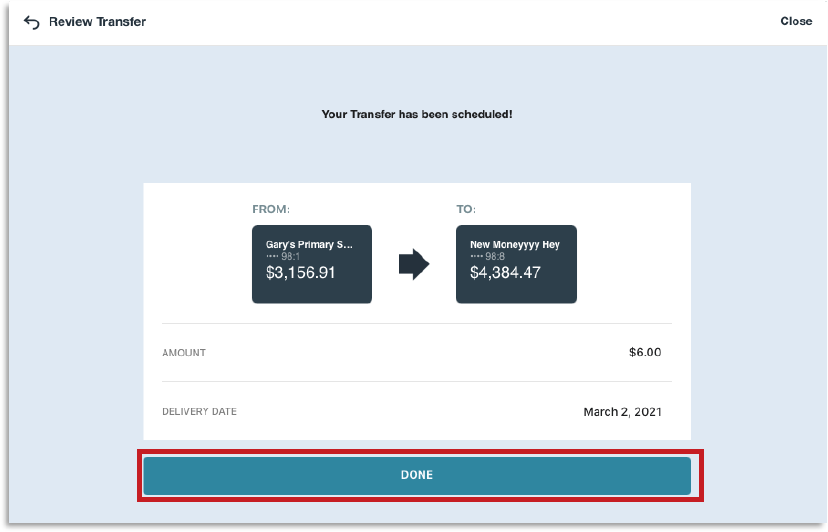
A success message displays. Click Done to return to the Transfers Screen
To edit recurring transfers:
a. Click the scheduled transfer to edit on the Transfers List, then click Edit
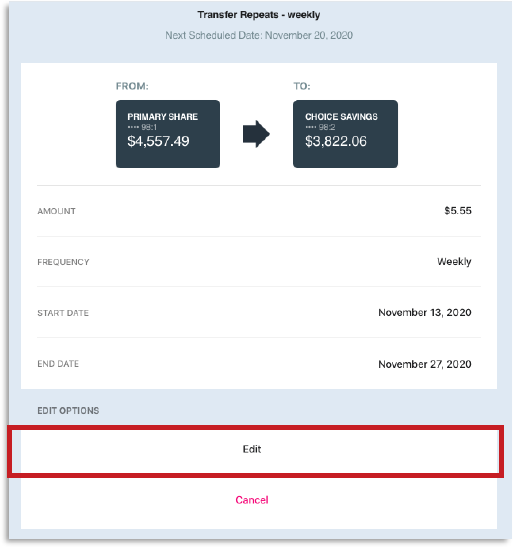
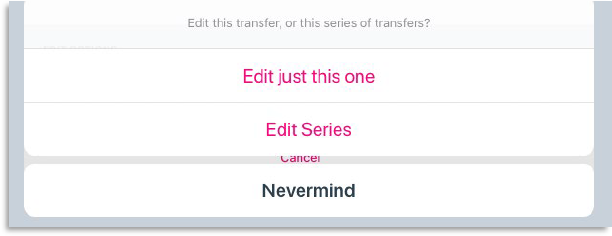
b. Next, select whether to Edit just this one (the displayed Transfer) or to Edit Series, or click Nevermind to return to the previous screen
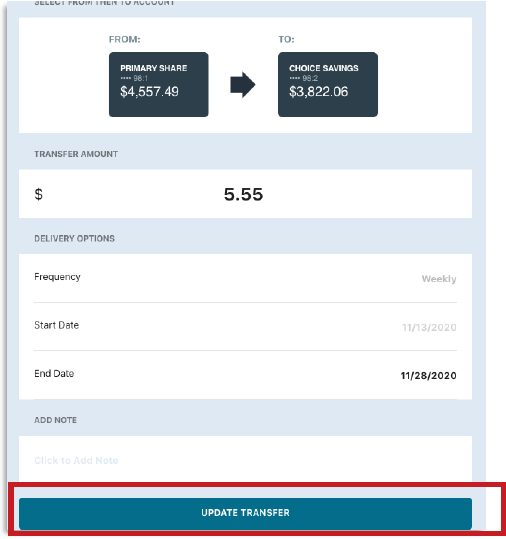
c. Edit the information, then click Update Transfer when finished

One-Time Transfer
Recurring Transfer
For recurring transfers, only the End Date is editable. If the frequency is no longer correct, you will need to cancel the series and re-initiate the recurring transfer.
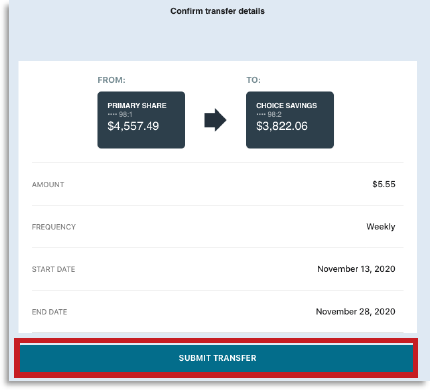
d. Next, click Submit Transfer

One-Time Transfer
Recurring Transfer
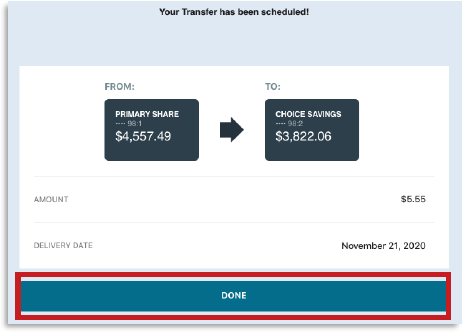
e. A success message displays. Click Done to return to the Transfers Screen
One-Time Transfer
Recurring Transfer
To cancel a one-time transfer:
1. Click the scheduled transfer to edit on the Transfers List, then click Cancel

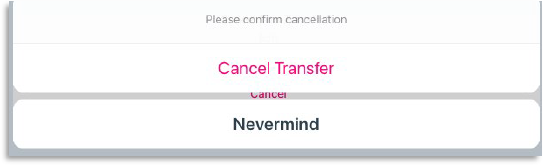
2. Click Cancel Transfer to proceed or click Nevermind to return to the previous screen

3. Click Cancel Transfer again to proceed
4. The transfer is now canceled and no longer displays in the Transfers List
To cancel a transfer in a series:
1. Click the scheduled transfer to edit on the Transfers List, then click Cancel
2. Next, select whether to Cancel This Transfer? (the displayed transfer) or to Cancel This Series of Transfers?, or click Nevermind to return to the previous screen
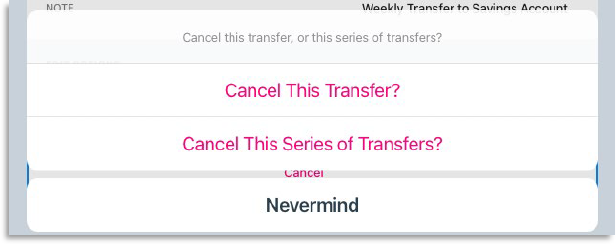
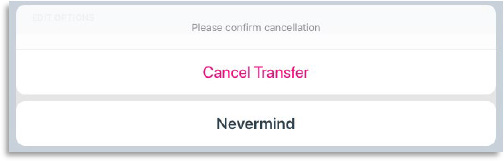
a. If canceling the displayed transfer, click Cancel Transfer to confirm
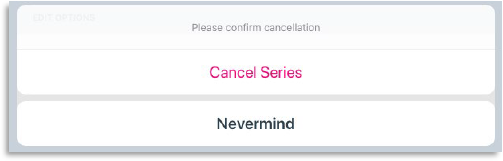
b. If canceling the series of transfers, click Cancel Series
5. The Transfer List refreshes, and the canceled transfers no longer display
Return to top
Searching Transfers
The Transfers Search screen allows you to search for Transfers by keywords using the Search Field, or by applying filters. Please note: The transfers you have received are not included in your Transfers Tile and are therefore not searchable within the Transfers tile. All transfers received can be found in your Account tile, where the date and amount of the transaction will be provided.
To search transfers:
1. On the Transfers Screen, click the Magnifying Glass above the Transfers List

2. The Transfer Search screen displays with the Search Field and Filters Icon
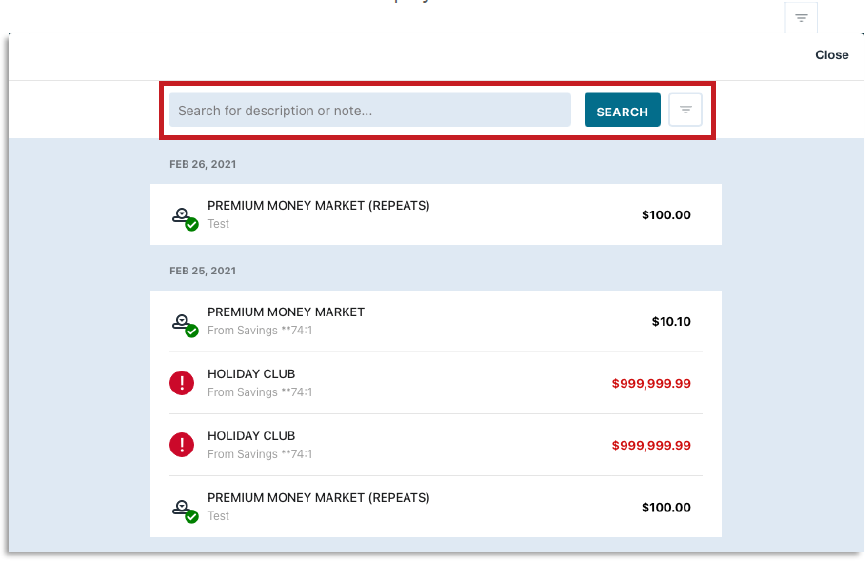
To search by Keyword:
a. Click into the Search Field and Enter the keyword or phrase to search by

b. Click Search

c. The Transfers List refreshes to display matching results
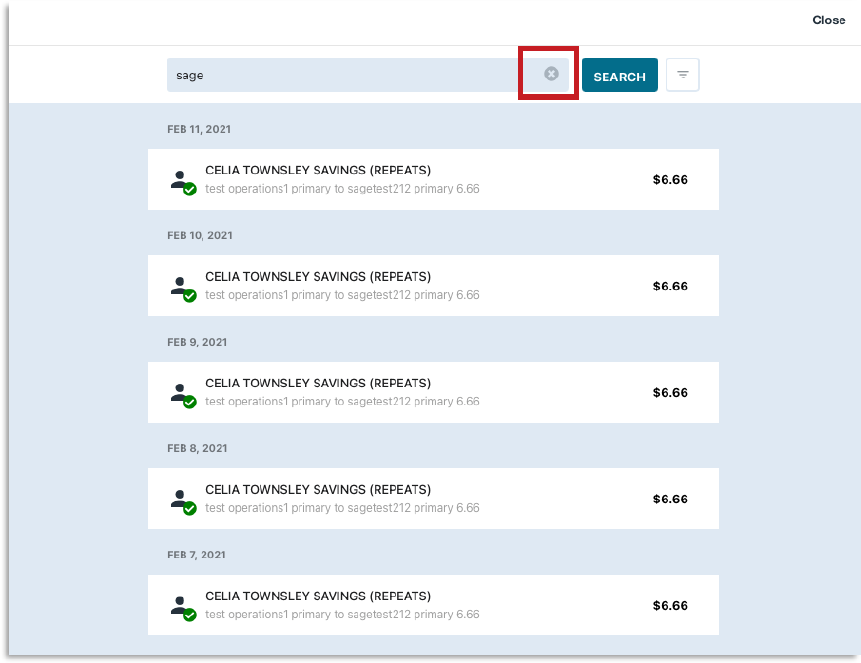
d. Click the  icon to clear the Search Field to enter a new search, or click Close to return to the Transfers screen
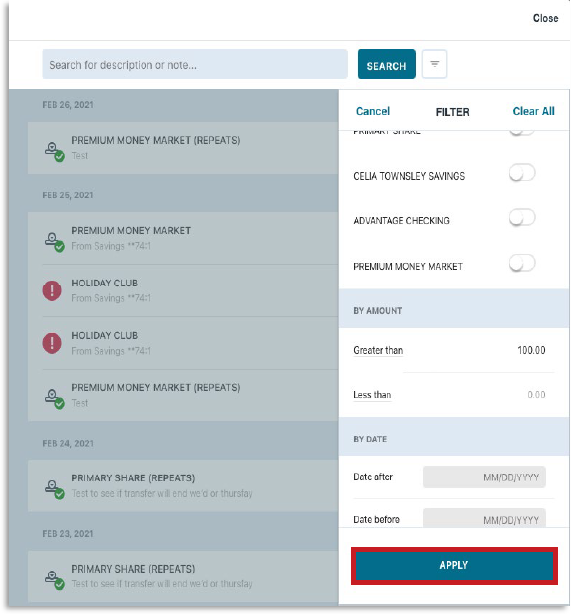
To filter by Account:
a. Click the  icon to expand the Filters List

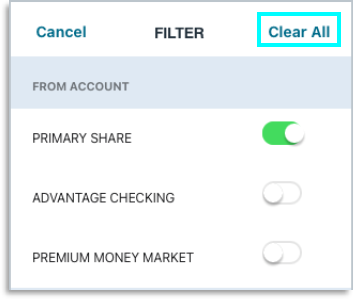
b. The From: Account and To: Account filter toggles display
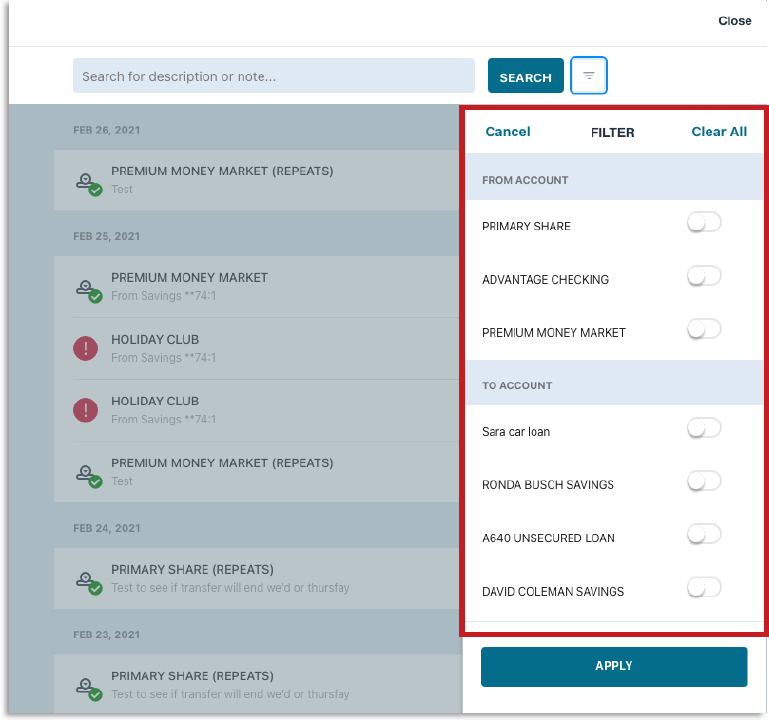
You may need to scroll to view all the available accounts in the From Account and To Account sections.
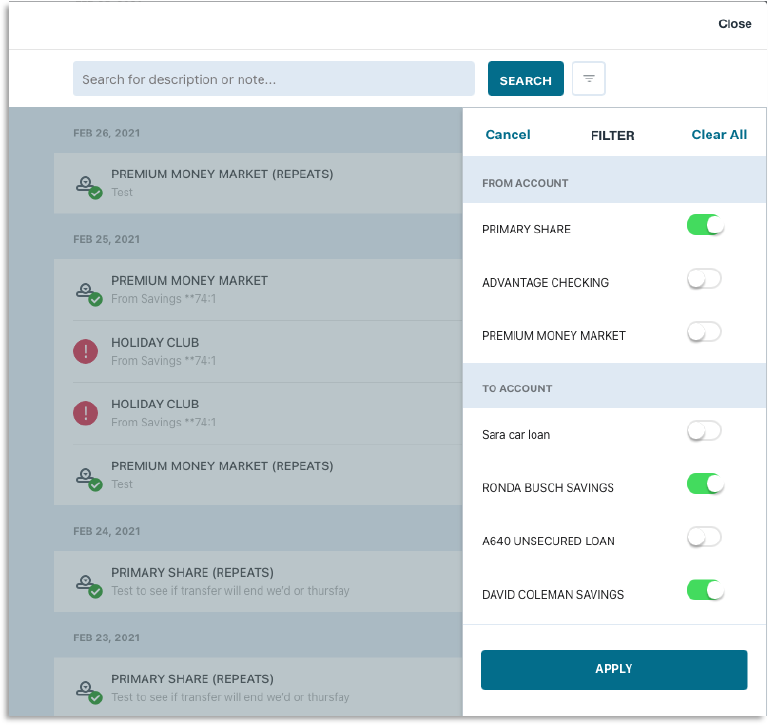
c. Click the right-side of the toggle or slide left-to-right next to the account(s) tosearch by. The toggle will turn green to indicate the active filter.
d. Click Apply to initiate the search, Clear All to remove the filter(s), or Cancel to return to the Transfers List
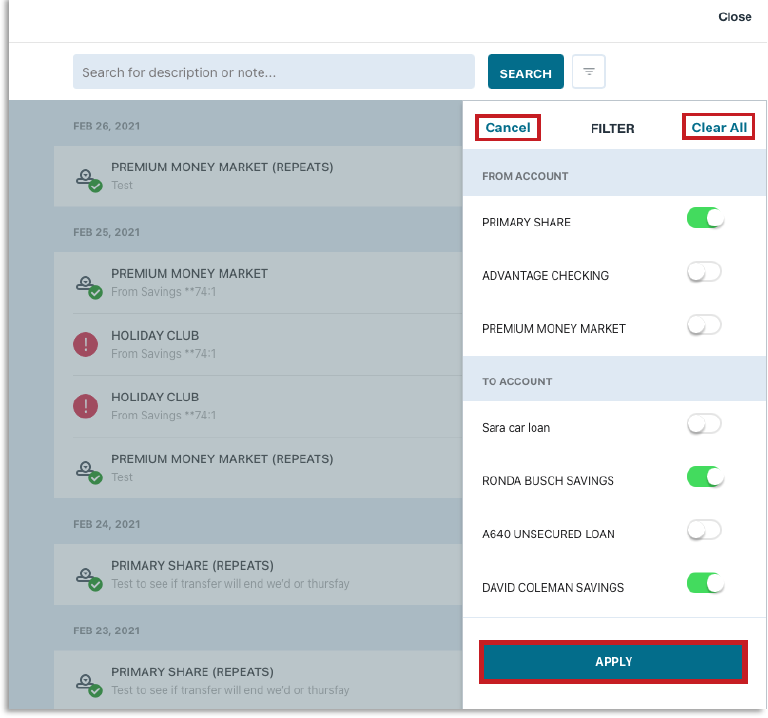
e. The Transfers List refreshes to display matching results. To remove applied filtersindividually, click the X icon next to the filter
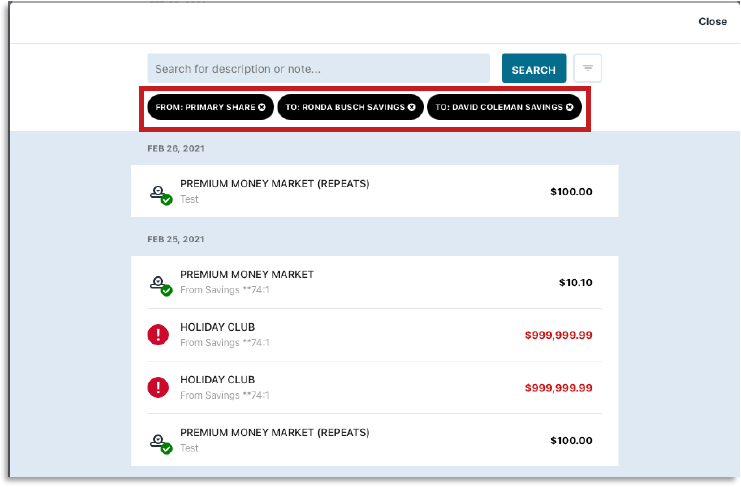
f. To clear all filters, click the  icon and click Clear All.
To search by Transfer Amount:
a. Click the filter icon
b. Scroll to locate the By Amount section
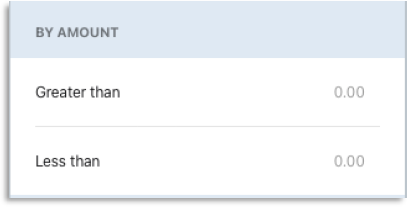
c. Enter the amount(s) to search by in the Greater than and/or Less than fields
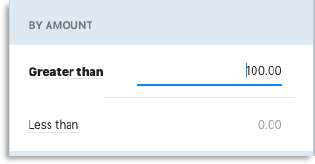
Greater than
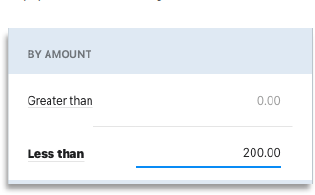
Less than

Greater than and Less than
d. Click Apply to initiate the search
e. The Transfers List refreshes to display matching results. To remove applied filters individually, click the X icon next to the filter
To search by date:
a. Click the icon to expand the Filters List
b. Scroll to locate the By Date section
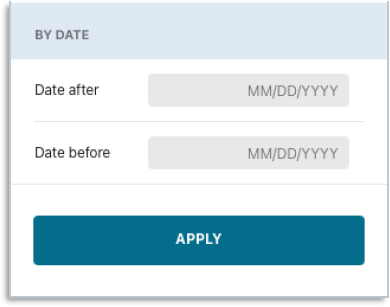
c. Click into the Date after and/or the Date before fields and use the calendar toselect the date(s) to search by
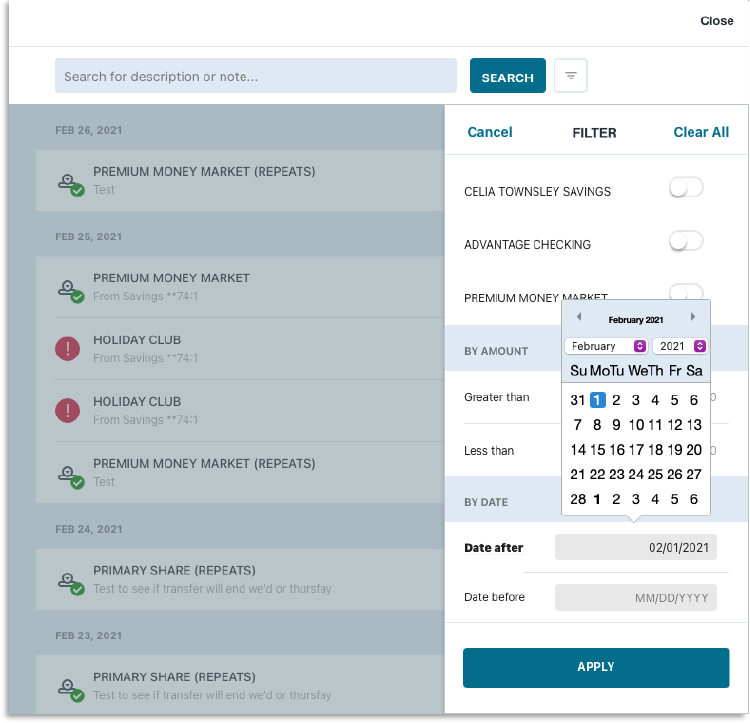
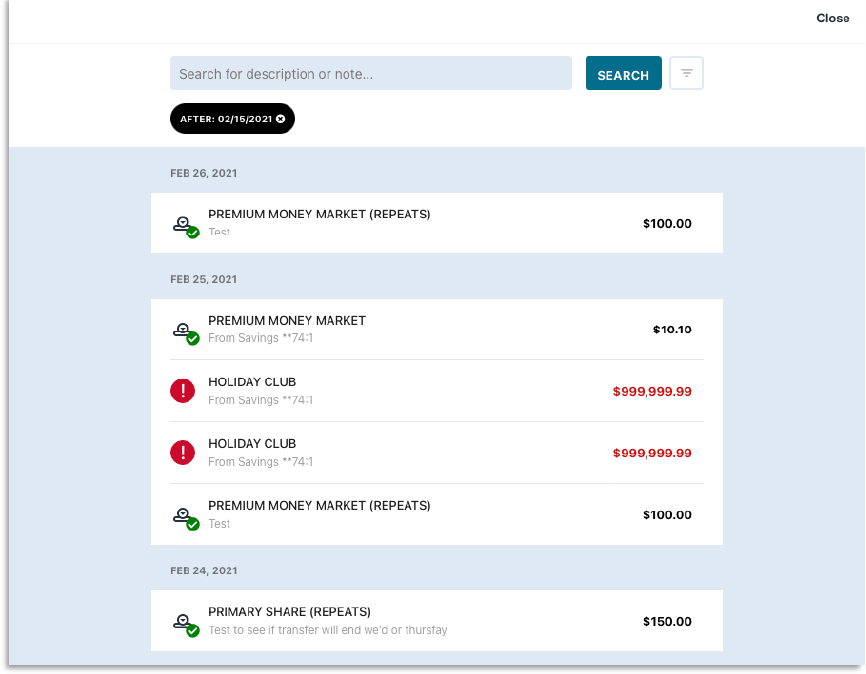
d. Click Apply to initiate the search
e. The Transfers List refreshes to display matching results. To remove applied filters individually, click the X icon next to the filter.
Filters may be applied in any combination of From Account, To Account, Amount, and Date.
Return to top