 Download the PDF
Home Screen Guide—TCU Mobile and Online Banking
The Home Screen is the first thing you’ll see when you log in, giving you a quick and easy jumping off point into all your online banking services.
The Home Screen is divided into four sections: Account Summary, Alerts, Tile Drawer, and the My Navigation menu. Use the top Account Summary section to navigate accounts at a glance, the middle Alerts section to view alerts, and the colorful icons in the Tile Drawer to access additional services like Transfers and Bill Pay. The My Navigation menu, in the top right-hand corner of the Home Screen, allows access to your Profile, Manage Alerts, Security Settings, the Communication Center and Logout.
Let’s take a look at all the Home Screen has to offer:
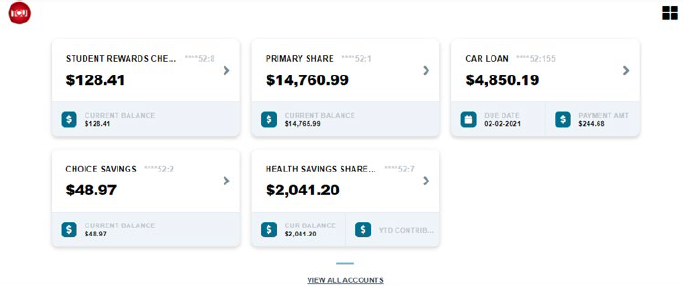
Home Screen (Desktop)
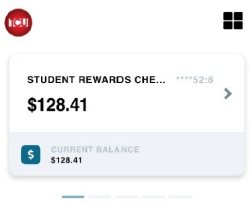
Home Screen (Mobile)
Home Screen (Desktop)
Home Screen (Mobile)
Account Summary
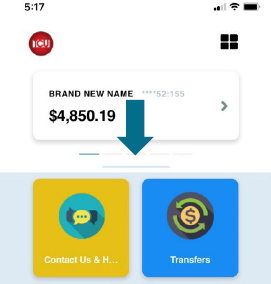
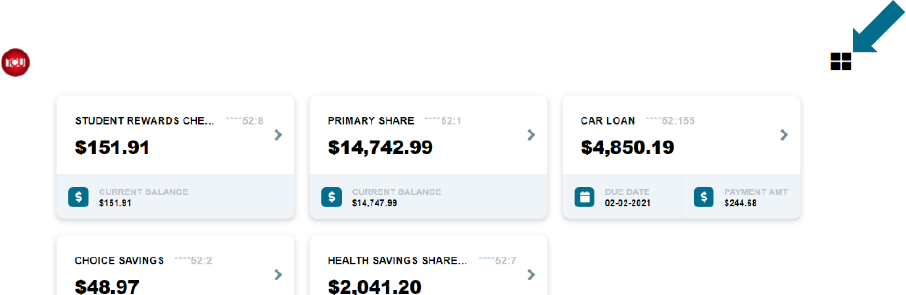
The top Account Summary section of the Home Screen allows you to quickly view and access all of your accounts. [1] Each account card highlights high level info, such as overall balance or payment due date. Navigating to the right account is as simple as a swipe of your finger (mobile) or a click of your mouse (desktop). Clicking on an account card takes you into the account details screen, where you can see recent activity, create account nicknames, or manage deposits and transfers.
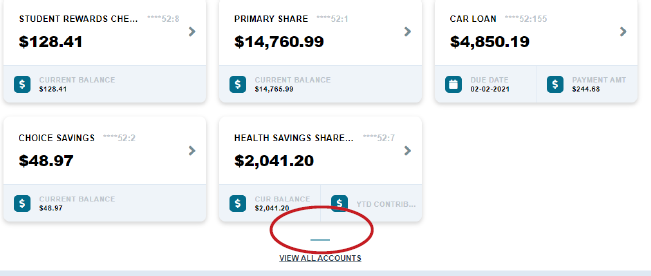
Account Carousel
The Account Carousel at the bottom of the account cards (circled in red below) allows you to navigate between pages of cards. Just swipe right or left (mobile) or click on the chevron (desktop) to jump to the next page.
Account Preview (Desktop)
Account Preview (Mobile)

My Accounts
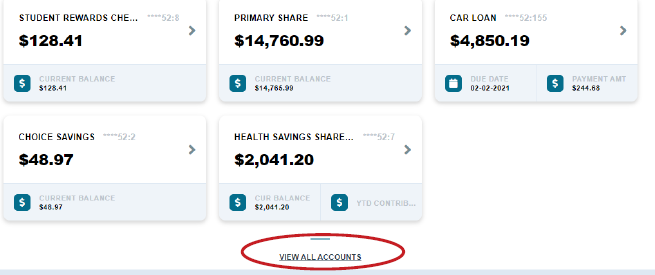
To view all of your accounts at once, just click View All Accounts as shown below (desktop) or swipe down at the bottom of the account summary screen (mobile). Your account list will expand. From here, you can tap or click on an account card to view more information or hit the back arrow or “X” to return to the home screen.
View All Accounts (Desktop)
View All Accounts (Mobile)
1 Members with commercial accounts will only be able to view their Commercial Account Detail Screens within their TCU Business Online Banking and TCU Business App.
Account List
The expanded account list has additional ways to customize your view:
- Hide Accounts from List: To hide an account from the Accounts List, swipe left (or click and drag right to left) on a card and click the “trash can” icon. The account is now hidden from the Accounts List. It can be unhidden through the Available Accounts screen.
- Unhide Accounts: To unhide an account, click the “plus sign” icon on the upper right of the accounts list to open the Available Accounts screen, and select the hidden account you wish to add.
- Reorder Accounts: To change the order of your listed accounts, click and hold an account until it turns slightly diagonal, then drag it to the preferred spot on the list.
Remember, you must be in the expanded list view (by swiping down on mobile or selecting “View All Accounts” on desktop) to customize or adjust your view. Please note: Once the changes are made, you may need to log out and log back in to see the changes reflected.
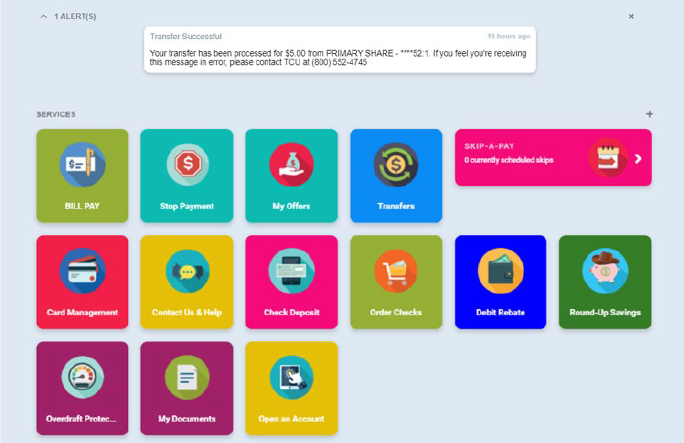
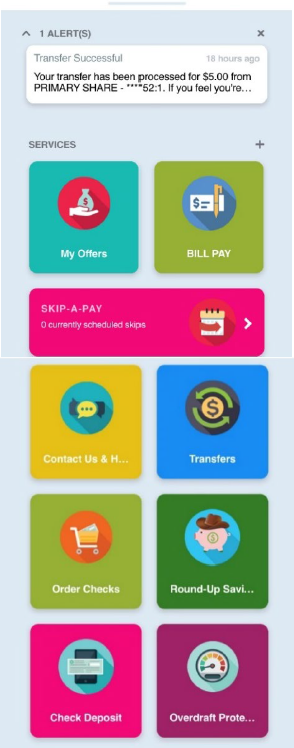
Alerts
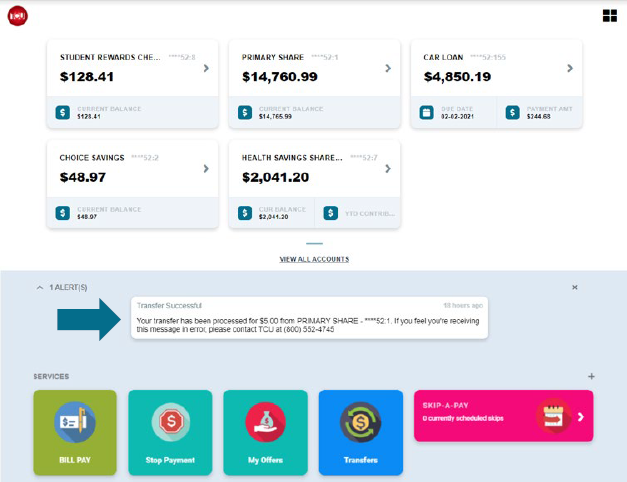
Alerts are displayed between the Account Preview and Tile Drawer so that they are highly visible when you sign in. An alert is a notification that does not require any action but shows important information such as account activity or a new message from a Member Support Representative at TCU. Multiple alerts will display in a collapsed view. To expand the alert section, click the arrow at the top-left corner of the Alerts List. Then to view more detailed information, click on the alert. Once an alert is viewed, it no longer appears in the notification section. You can also delete a single alert by swiping/dragging left on the alert and selecting the trash can icon. To dismiss all alerts at once, click the “X” icon on the righthand side.
Alerts Section (Desktop)
Single Alert Displayed (Mobile)

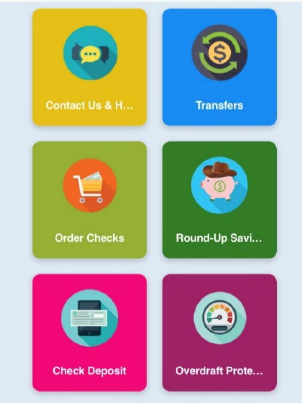
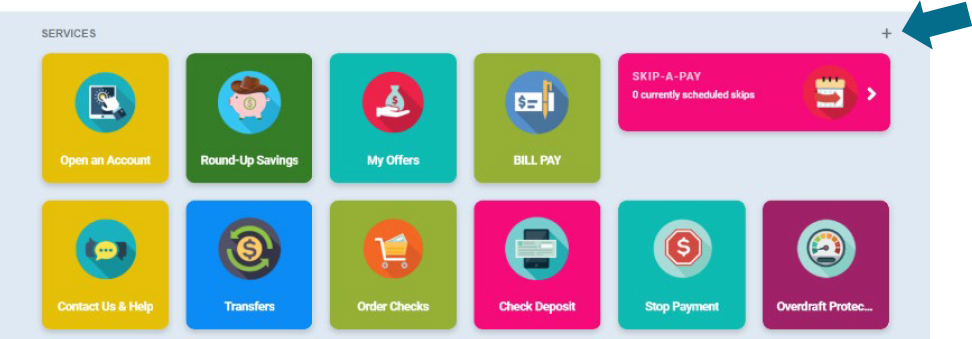
The Tile Drawer
The lower half of the Home Screen is called the Tile Drawer. The Tile Drawer allows you to access banking services such as transfers, bill pay and check ordering. Each service has its own tile where services can be launched. For example, simply click the Transfers tile to initiate and review transfers to other TCU members or outside accounts. You can also easily rearrange or hide tile icons to customize the Tile Drawer to your specific preferences based on which you access most.
Tile Drawer (Desktop)
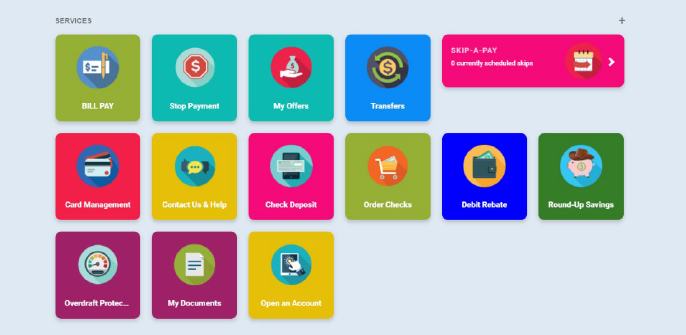
Tile Drawer (Mobile)
What Can I do Inside Tiles?
Here is a short description of the services available for each:
- Contact & Help — connect with TCU
- Member Services phone number and hours
- Chatbot (available 24/7)
- Live Chat (M-F 7am-7pm ET and Sat-Sun 8am-1pm ET)
- Book an Appointment
- Branch & ATM Locations
- Financial Education
- Help & FAQs
- Mailing Info for TCU and Card Payments
- My Offers — access special loan rate offers, chosen just for you
- Transfers — move funds from one account to another
- Account to account transfers
- Member to Member transfers
- External transfers to your accounts at other FIs
- Reorder Checks — reorder checks for your checking account
- If it’s your first time ordering checks, you will need to go to your local service center
- Deposit a Check — deposit a check electronically with your device’s camera
- See Deposit Limits
- View Deposit History
- Stop Payment — provides ability to stop payment on a check
- A fee is assessed for each request
- View Stop Payment History
- Bill Pay — receive and pay electronic bills (eBills)
- Easily search for payees
- Make a one-time payment
- Manage and schedule recurring payments
- Set up specific alerts to track payment activity
- Manage Cards — activate and manage your debit and credit cards
- Update PIN or Replace Card
- Set up Round-Up Savings on your debit card
- View your Debit Rebate progress and history
- Report and manage Travel Plans
- Open Accounts — open new deposit or loan accounts
- Select from checking, savings or certificates
- Select Vehicle/Recreation, Personal Loan or Credit Card
- Check status of application
- My Documents — view your statements and eNotices
- View and filter for available documents
- Skip-A-Pay — Sit back, relax and forget your loan payment for one month!
- Check for eligibility and schedule a skip
- A fee is assessed for each request
- View Loan Deferment History
- Debit Rebate — earn cash back on all non-PIN transactions made with your debit card. Track your progress with an option to cash out when you hit $30!
- Track Rebate and Amount Spent
- View rebate history
- Round-Up Savings — automatically build up your savings every time you use your debit card
- Watch your savings grow effortlessly!
- WalletFi — Monitor and manage all online accounts connected to your TCU cards
- Cards linked to your favorite subscriptions
- Your recurring bills (insurance, utilities, and more)
- Your cards on file as a payment method with various shopping websites
- View transaction history by company
- Switch, cancel or contact a company
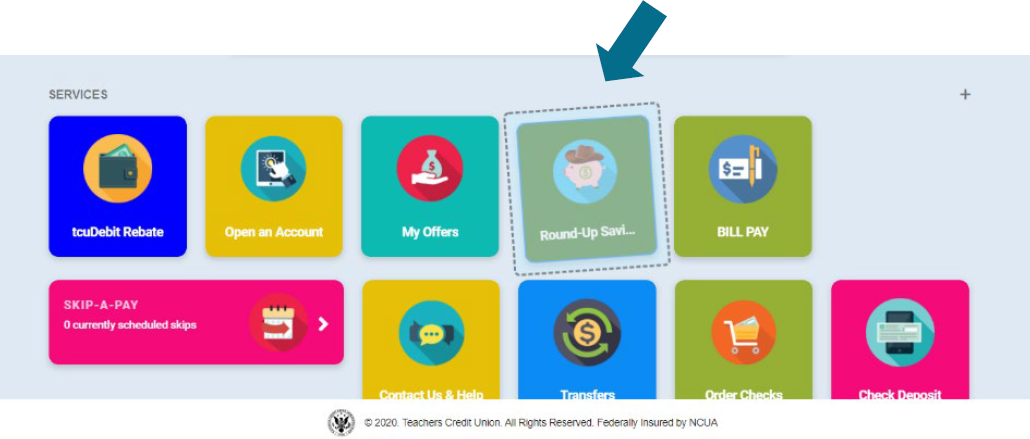
Configuring Your Tiles
You can easily customize the Tile Drawer by dragging Tiles into their preferred position, deleting unwanted Tiles, or adding Tiles using the Add Services button.
- Reordering Tiles: To change the order in which tiles/services are presented, press and hold (on Mobile) or click and hold (on Desktop) until the Tile turns slightly diagonal. Then, drag the Tile to the preferred position.
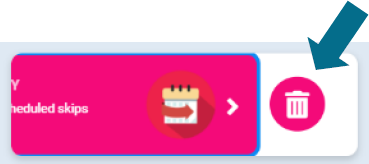
- Hide Tiles: To hide a Tile from the Tile Drawer, swipe left (or click and drag right to left) on the tile and click the “trash can” icon.
- Resize Tiles: Some tiles can be resized between small (default size), medium and large to change their look in the Tile Drawer. To resize a tile, swipe right on mobile or click and drag left-to-right on desktop. The resize icon will display on the left-side of the Tile. Click on it and select the desired Tile Size:

NOTE: These tiles can be resized: Manage Cards, Overdraft Mgmt*, Round-Up Savings, Skip-A-Pay, Debit Rebate and WalletFi.
Add Services
If you’re wondering where your hidden Tiles went or want more Tiles/services displayed in the Tile Drawer, check the Add Services screen. The small "plus" sign at the top of the Tile Drawer takes you to the Add Services screen and allows you to display various Tiles/services on the Home Screen or reveal Tiles you’ve previously hidden.
To return to the previous screen without adding a service, click the back arrow as shown here:

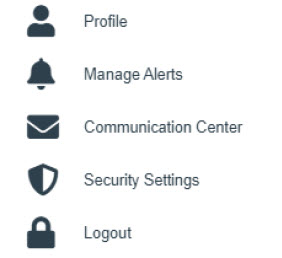
My Navigation
The My Navigation menu is in the top right-hand corner of the Home Screen. The icon looks like a four-square window and houses your Profile, Manage Alerts, Security Settings, Communication Center, and option to Logout.
On the Home Screen, click or tap on the My Navigation icon.
The My Navigation menu expands:
Profile
Update your contact information such as e-mail address, mailing addresses, phone numbers and Multi-factor Authentication (MFA) settings under Profile.
- On the Home Screen, click or tap the My Navigation icon
- The My Navigation menu expands
- Click Profile to access the Profile Settings screen
- Proceed to make any updates as needed or click/tap Back to Dashboard to return to the Home Screen
Manage Alerts
Set up, configure and edit alerts related to account balances, account transactions, secure messaging, profile information, transfers and bill pay. To access Manage Alerts:
- On the Home Screen, click or tap the My Navigation icon
- The My Navigation menu expands
- Click Manage Alerts
- Proceed to Configure an Alert, Set up a new Balance/Transaction Alert, Edit an Alert or click/tap Back to Dashboard to return to the Home Screen.
Note: For more details on the functionality of Manage Alerts, review the Alerts Guide. This guide provides step-by-step guidance on the following: Configuring an Alert, Setting up a new Balance/Transaction Alert, and Editing an Alert.
Communication Center
Communication Center acts as a hub to send and review received messages from TCU. To access Communication Center:
- On the Home Screen, click or tap the My Navigation icon
- The My Navigation menu expands
- Click Communication Center
- Proceed to create new messages or review received messages or click/tap Back to Dashboard to return to the Home Screen
Security Settings
Security Settings allows you to update your username and password credentials. To access Security Settings:
- On the Home Screen, click or tap the My Navigation icon
- The My Navigation menu expands
- Click Security Settings
- Proceed to update your Username or Password or click/tap Cancel to return to the Home Screen
- Enter the current password, then click Continue
- Once the updated username or password is accepted, a confirmation displays. Click OK to return to Security Settings, then click Cancel to return to the Home Screen
- Alternatively, you may exit without updating any credentials by clicking Cancel
- In this case, click Cancel again to return to updating credentials.
- Click OK to exit without updating credentials
Note: If your Desired Username is unavailable, a message displays stating: “Your Desired Username is already taken. Please choose another username”. If password guidelines are not met, a message displays stating: “Your new password does not meet the guidelines listed above”.
Logging Out
To log out of online banking:
- On the Home Screen, click or tap the My Navigation icon
- The My Navigation menu expands
- Click Logout
- A confirmation message displays. Click Yes to logout, or click No to remain logged in.
Disclaimer
* Visit your local TCU branch or call (800) 552-4745 to ask a Member Services Representative for more information about overdraft protection options.